Creating a project
New projects are created through a three-step wizard. The wizard is the same whether you start it from the dashboard's + New button or from the projects list.
Open the wizard
Two ways:
- From the dashboard: the left column Projects card has a blue + New button at the top. Click it.
- From the projects list: click + Create new at the top-left of the sidebar, then choose New Project from the dropdown.
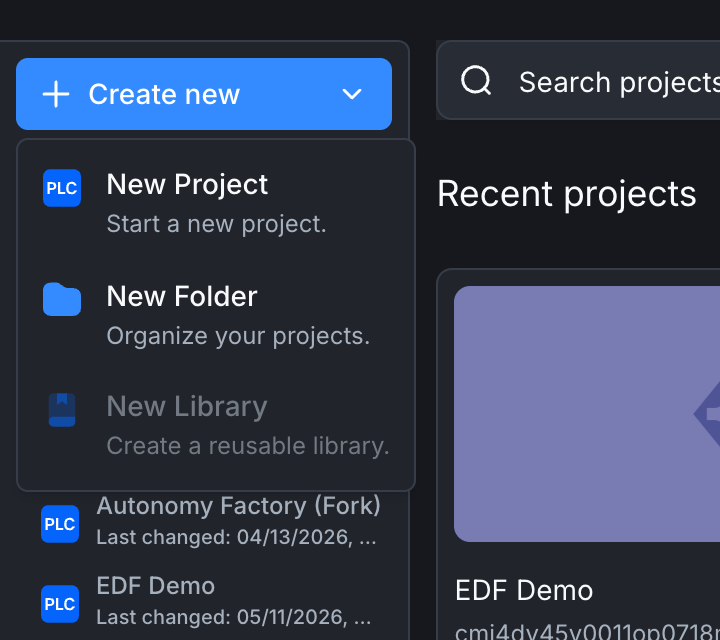
(The dropdown also has New Folder for organizing projects and New Library for reusable code.)
Step 1, Project info
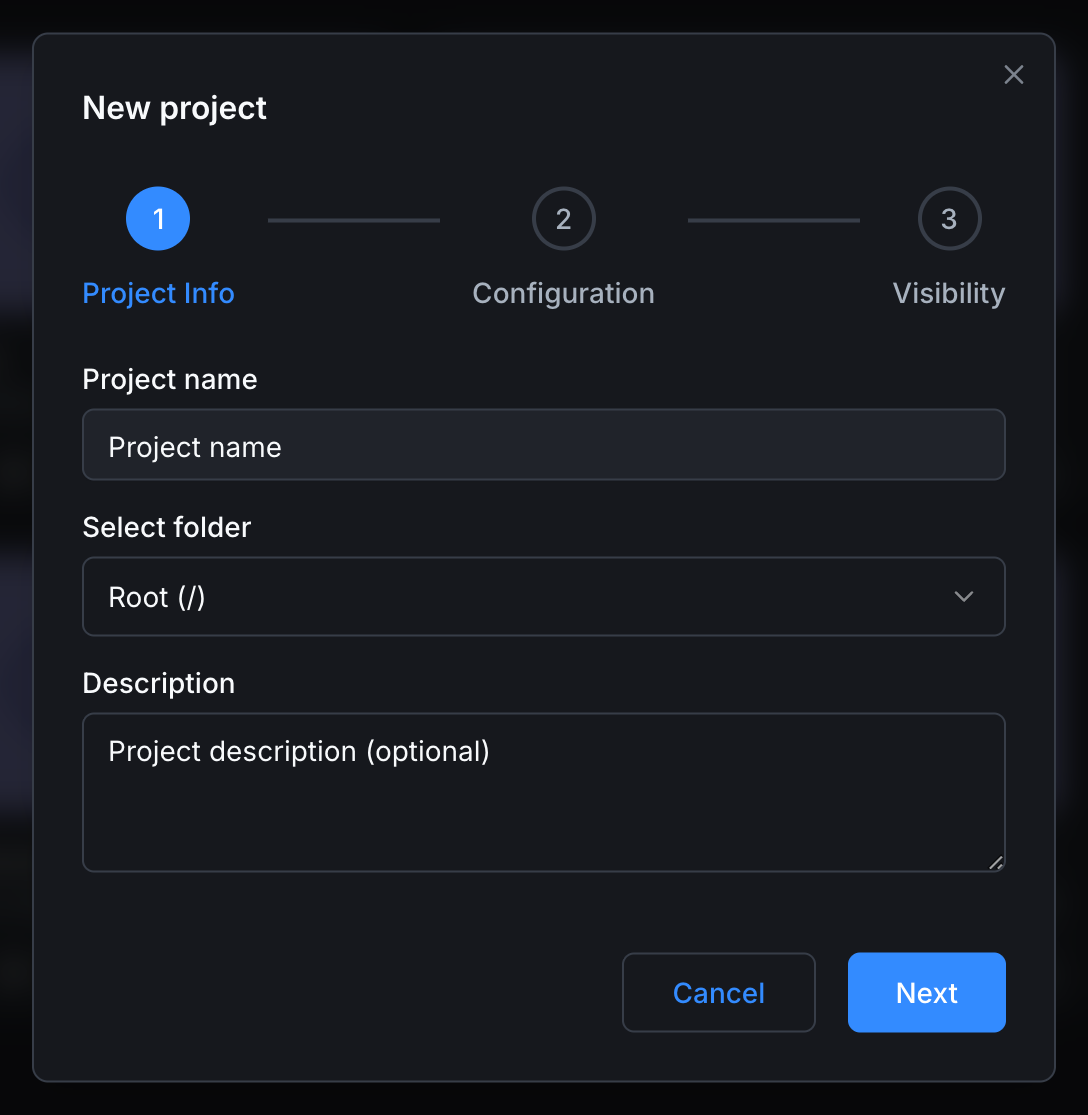
| Field | Required | Notes |
|---|---|---|
| Project name | Yes | Any text. Used as the project identifier. Two projects in the same workspace can't share a name. |
| Select folder | No | Leave as Root (/) to put the project at the top level. Otherwise pick one of your existing folders. Folders are visible in the left sidebar of the projects list and help group related projects. |
| Description | No | Free text. Shown on the project card in the projects list and in feed activity items. You can edit it later. |
Click Next to continue.
Step 2, Configuration
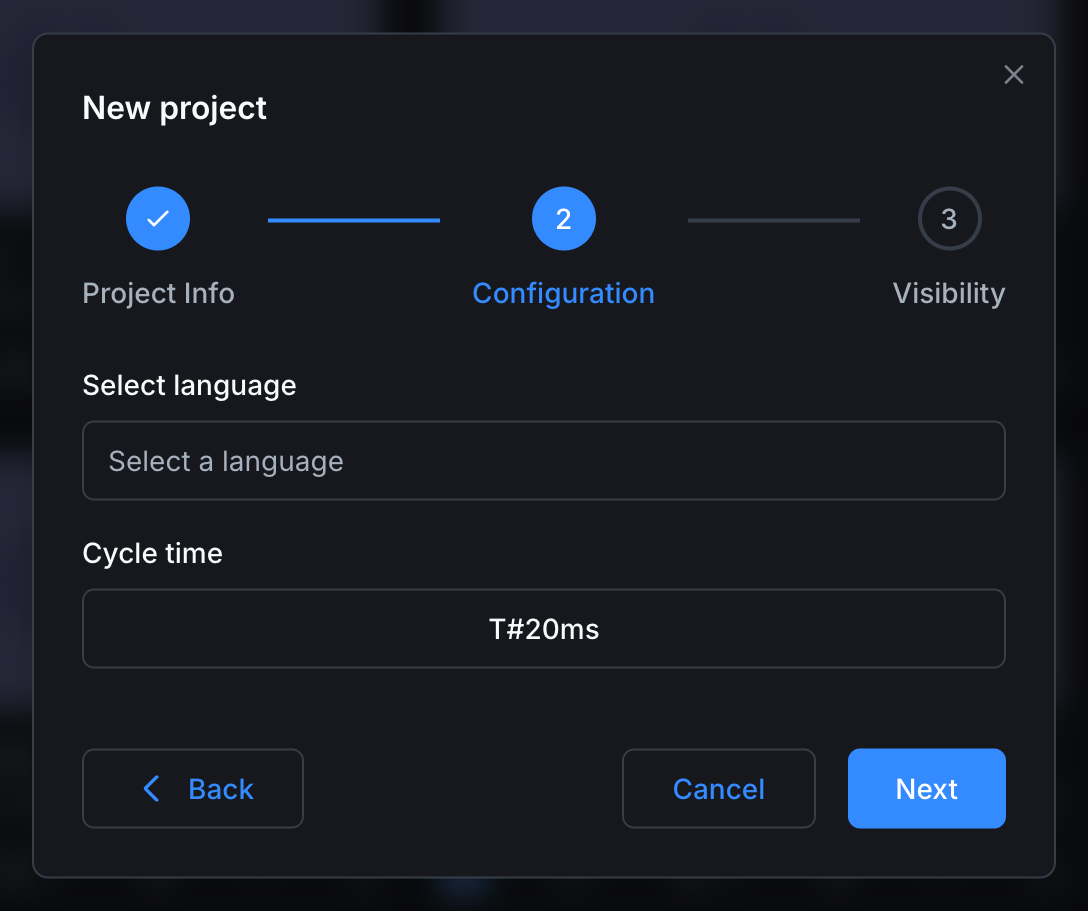
| Field | Required | Notes |
|---|---|---|
| Select language | Yes | The default programming language for new POUs. Pick from the dropdown. |
| Cycle time | Yes | How often the PLC runtime executes the main program. Default is T#20ms. Click the field to open a time picker with separate day / hour / minute / second / millisecond / microsecond inputs. |
Available languages
Clicking the language dropdown reveals the four IEC 61131-3 languages currently supported in new projects.
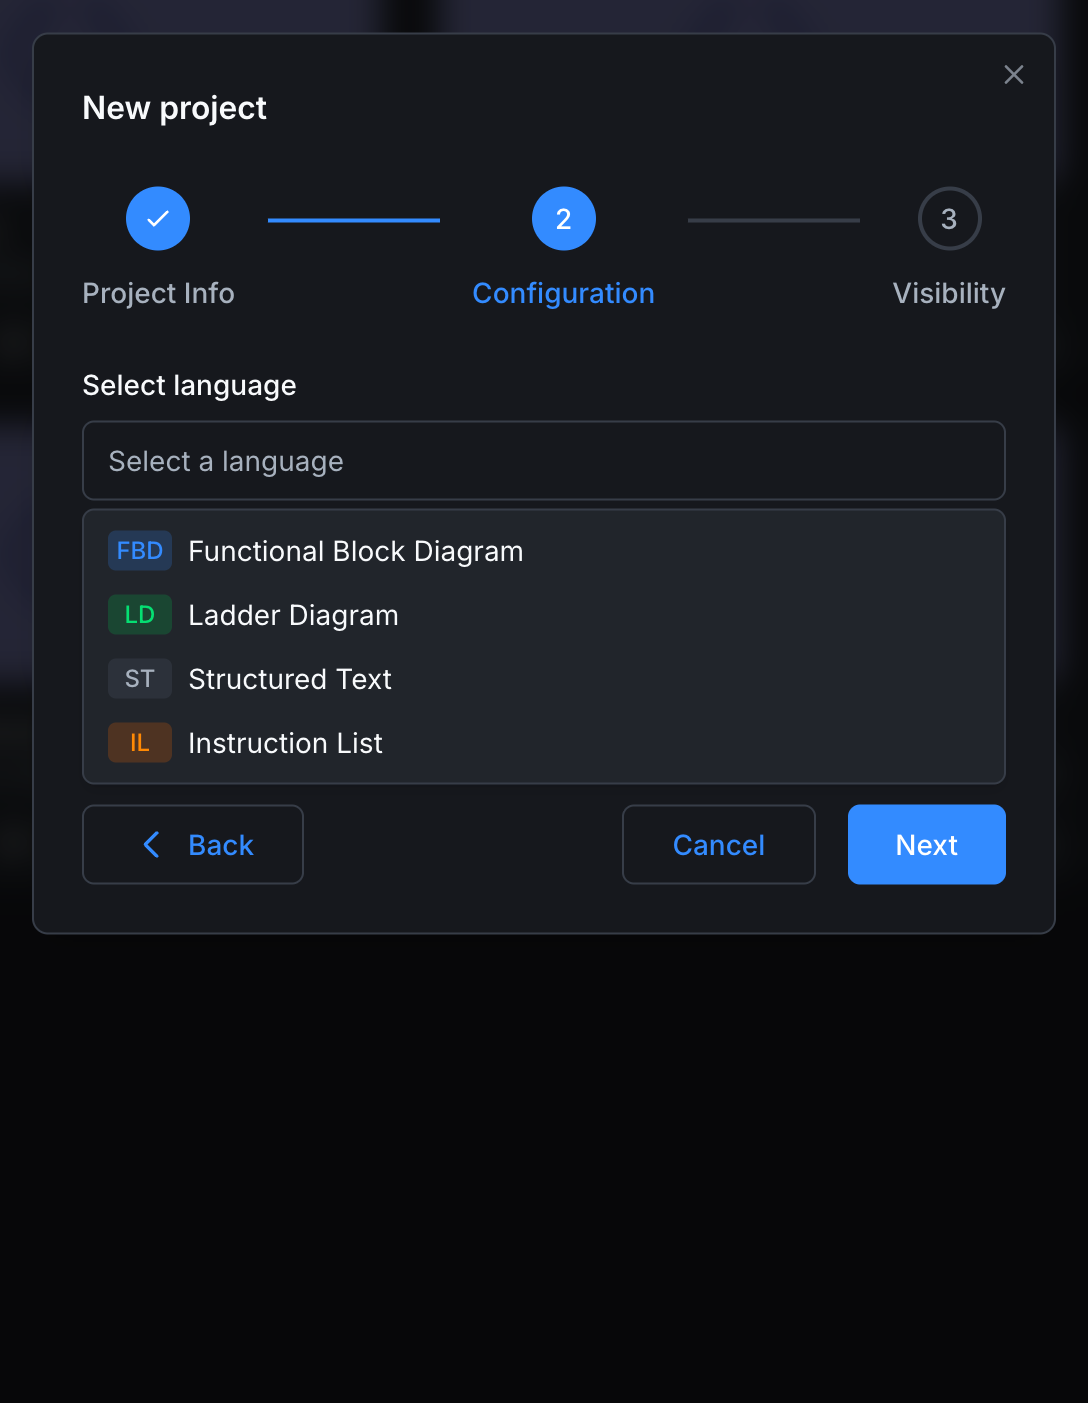
- FBD: Functional Block Diagram.
- LD: Ladder Diagram.
- ST: Structured Text.
- IL: Instruction List.
You can mix languages inside a project later. This step just sets the language the editor opens with.
Cycle time picker
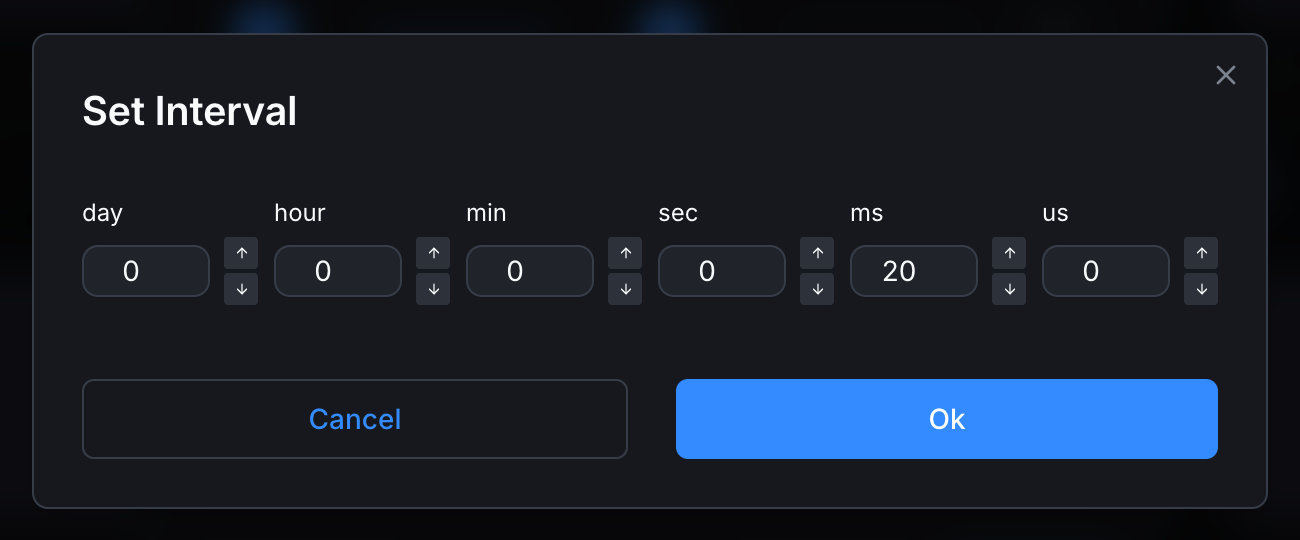
A few tips on cycle time:
- Most discrete control logic is fine at 10 to 50 ms.
- Tight motion control may need 1 to 5 ms. Be aware that very short cycles increase CPU load on the vPLC.
- Slow data-collection programs can use 100 ms or longer.
You can change cycle time later through the editor (it's stored in project.json).
Click Back to revisit step 1, Cancel to dismiss the wizard, or Next to continue.
Step 3, Visibility
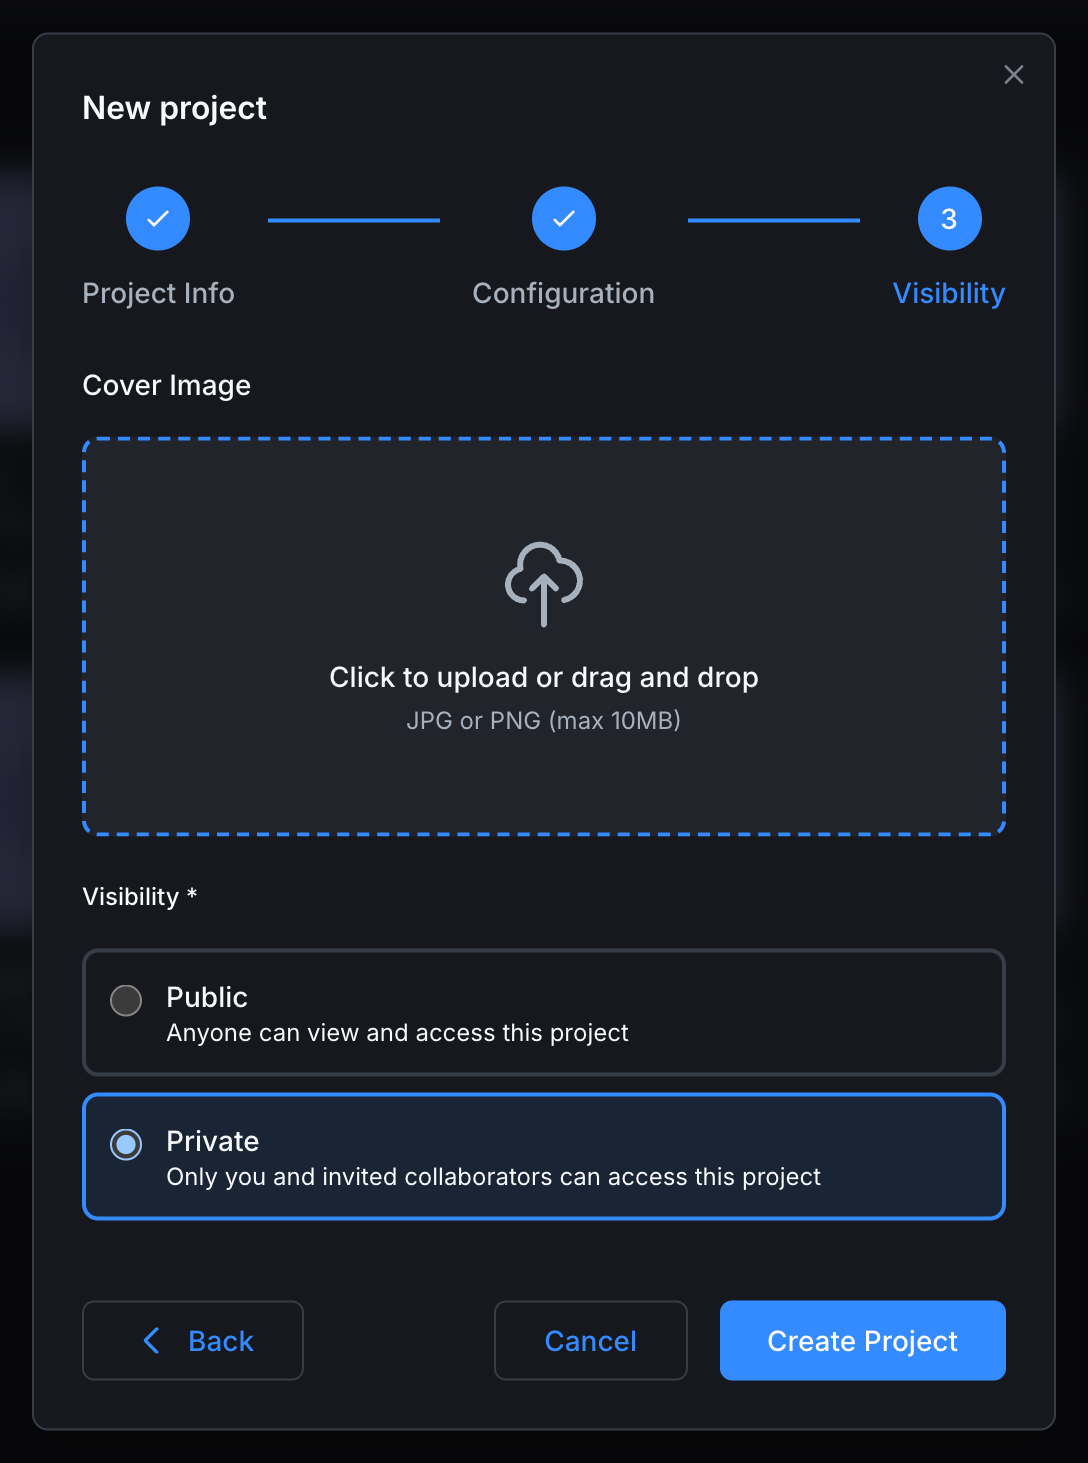
The last step asks for a cover image and the project's visibility.
| Field | Required | Notes |
|---|---|---|
| Cover Image | No | An image shown on the project card and at the top of the project page. JPG or PNG, max 10 MB. Click the dashed area to upload, or drag-and-drop. Leave blank for the default placeholder. |
| Visibility | Yes | Public: anyone can view and access this project. Private: only you and invited collaborators can access. |
Private is selected by default if your plan allows private projects. On the Community plan, only Public is available.
Click Create Project to finish. The wizard closes, the project is created, and you land on its Code tab.
What just happened in the background
The platform did the following on the server side:
- Created an empty git repository for your project.
- Made an initial commit authored by
Autonomy Edgecontaining the project skeleton:programs/,functions/,function-blocks/,devices/, andproject.jsonwith the language and cycle time you chose. - Set the visibility flag.
- Added the project to your dashboard feed (so other people see "{you} created a public project" if it's public).
If you go to the Code tab now you'll see the file tree pre-populated and a single commit named Initial commit in the commit summary bar. You're ready to open the project in the editor and start writing logic.
Next steps
- Open in editor and write code: click Open in editor at the top right of the project page. See the OpenPLC Editor docs.
- End-to-end first program → Quick Start Guide.
- Find your project later → Projects list.
On This Page