Certificates
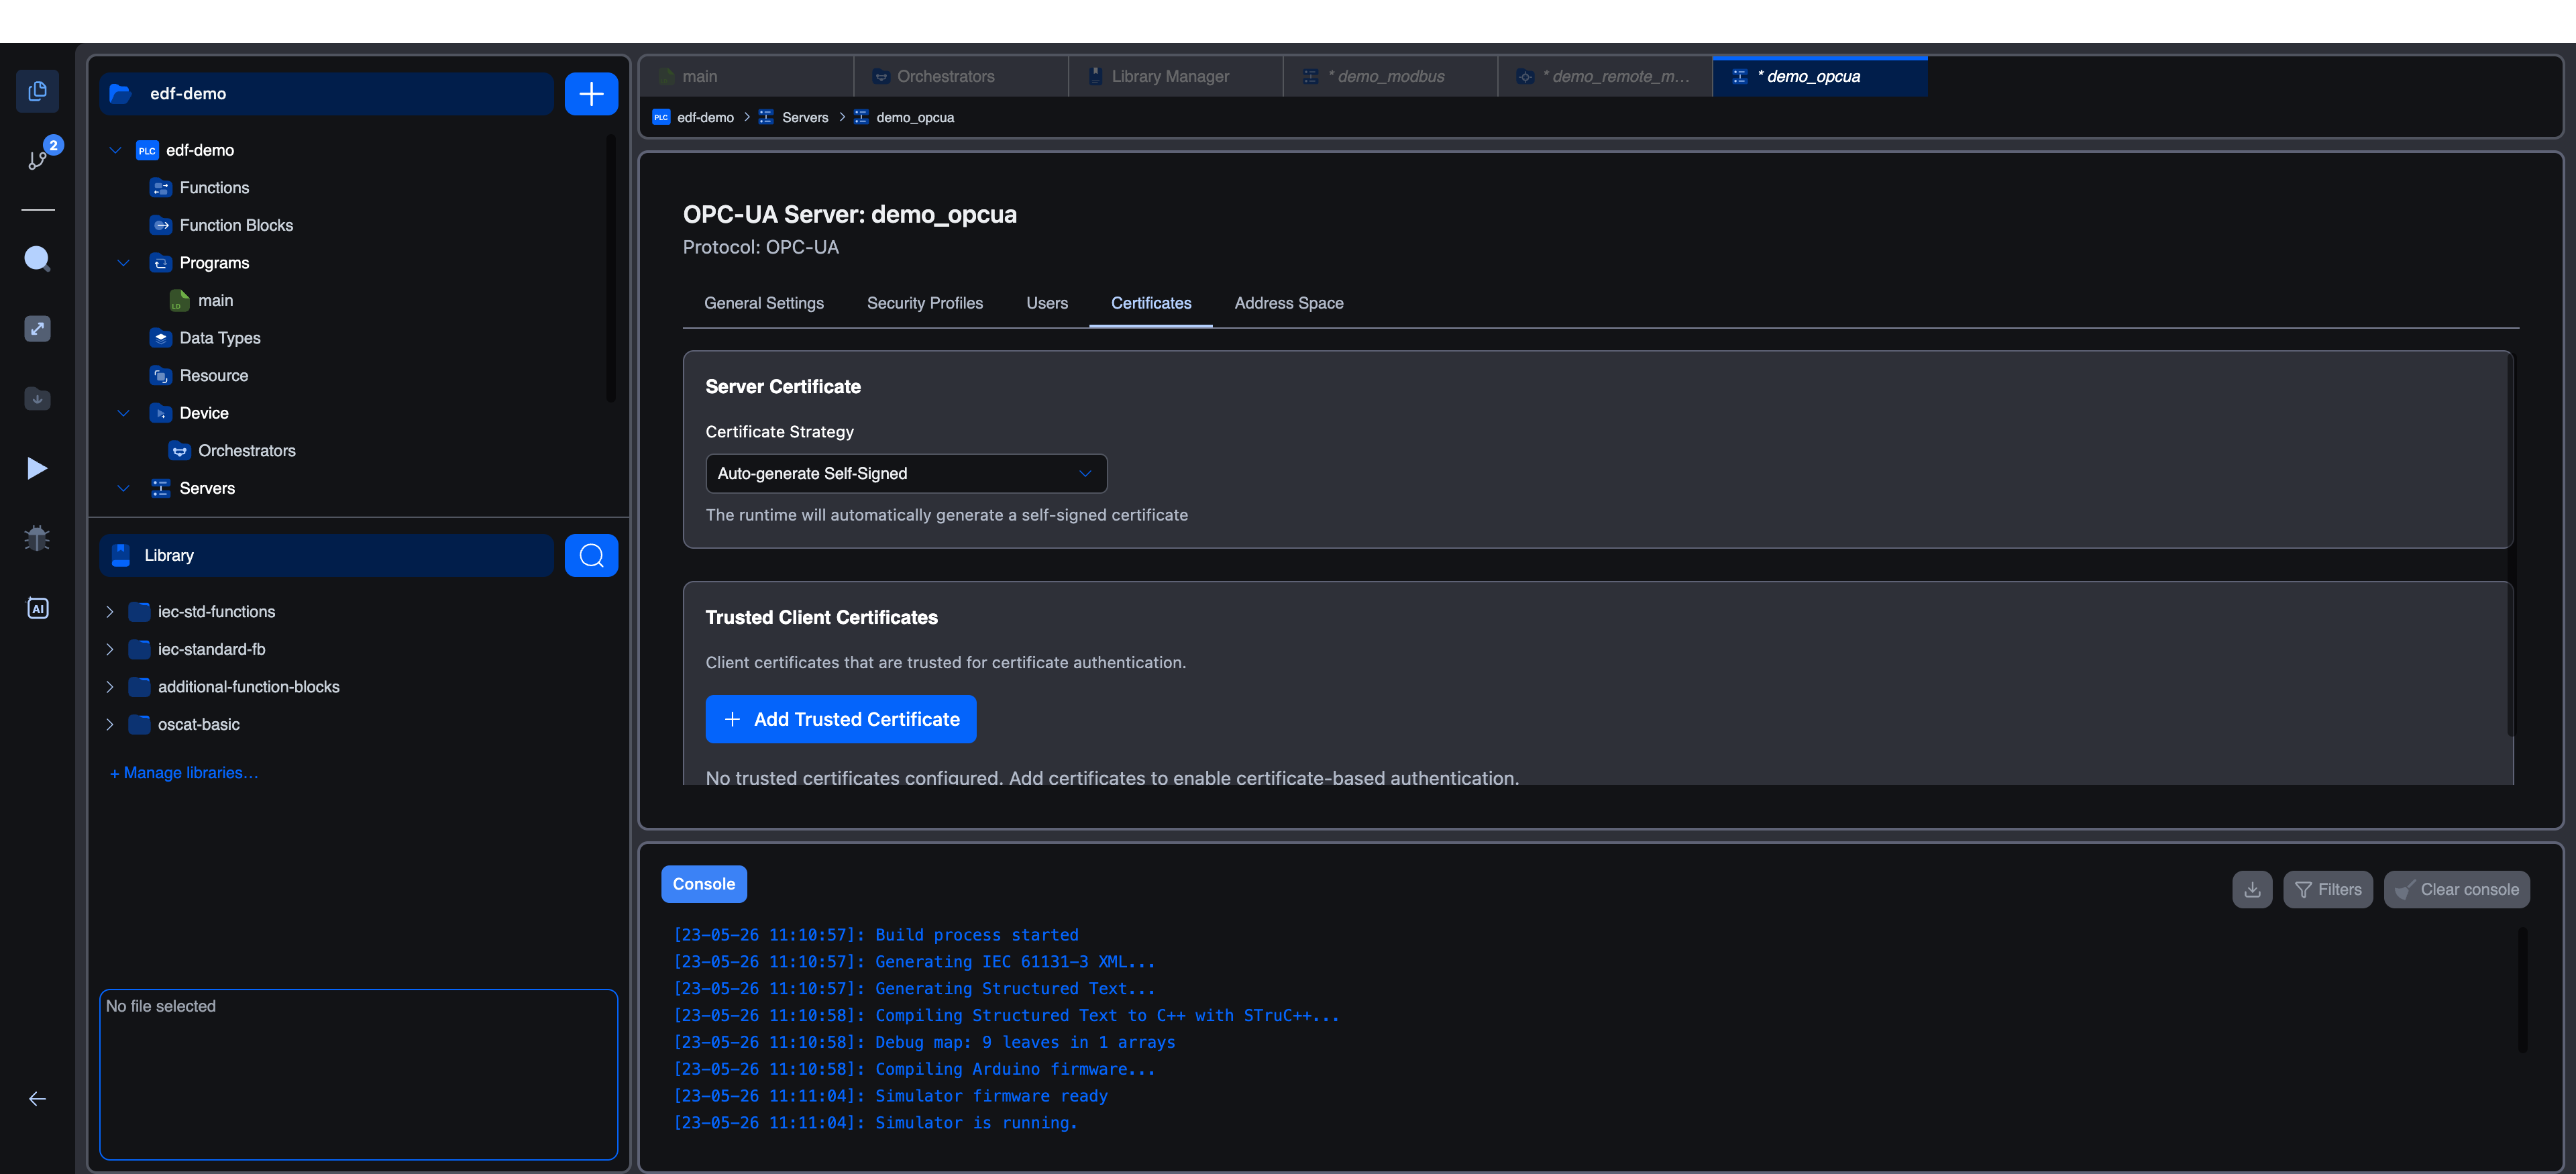
The Certificates tab manages the X.509 certificates the OPC-UA server uses for its own identity and the certificates it accepts from clients. The tab is divided into two sections: Server Certificate and Trusted Client Certificates.
Server Certificate
The server presents a certificate during the OPC-UA handshake. Clients use it to verify they are talking to the correct server before they reveal credentials.
Certificate Strategy
The Certificate Strategy dropdown chooses how the server obtains its certificate:
| Option (as shown in the UI) | Description |
|---|---|
| Auto-generate Self-Signed | Default. The runtime creates a self-signed certificate the first time the server starts and reuses it on subsequent runs. The helper text reads "The runtime will automatically generate a self-signed certificate." |
| Use Custom Certificate | You supply a certificate and matching private key in PEM format. Use this when your organisation has a Certificate Authority (CA) or already manages an OPC-UA PKI. The helper text reads "Provide your own certificate and private key." |
Custom Server Certificate
When you choose Use Custom Certificate, two PEM input areas appear below the dropdown.
| Field | Description |
|---|---|
| Server Certificate (PEM format) | The certificate, including the -----BEGIN CERTIFICATE----- / -----END CERTIFICATE----- markers. The placeholder shows the expected format. |
| Server Private Key (PEM format) | The matching private key, with -----BEGIN PRIVATE KEY----- / -----END PRIVATE KEY----- markers. |
Each text area is paired with a Browse File... button that opens a file picker. The picker accepts .pem, .crt, and .cer files for the certificate, and .pem or .key files for the private key. The selected file's contents are loaded into the text area, where you can review or edit them.
Custom certificates are saved with the project. Make sure the certificate's Application URI matches the Application URI field on the General Settings tab. Clients reject certificates whose URIs do not match the advertised server URI.
Self-Signed Server Certificates
The auto-generated self-signed certificate is signed by the server itself, not by a recognised CA. Most OPC-UA clients flag this as untrusted on the first connection. The fix on the client side is to add the server certificate to the client's trust list once and accept future connections.
For production deployments, prefer custom certificates issued by a CA your clients already trust.
Trusted Client Certificates
This section lists the X.509 certificates that the server accepts for Certificate authentication. A profile that allows certificate authentication only lets in clients whose certificate ID is present here.
When the list is empty, a placeholder reads: "No trusted certificates configured. Add certificates to enable certificate-based authentication."
Adding a Trusted Certificate
Click + Add Trusted Certificate to open a modal titled Add Trusted Client Certificate.
| Field | Description |
|---|---|
| Certificate ID | Required. Maximum 64 characters. Must contain only letters, numbers, hyphens, and underscores. Must be unique (case-insensitive). The helper text reads "Unique identifier used to reference this certificate in user configuration." The ID you choose here is what appears in the Client Certificate dropdown on the Users tab. |
| Certificate (PEM format) | Required. The certificate body wrapped in -----BEGIN CERTIFICATE----- / -----END CERTIFICATE-----. A Browse File... button is available below the text area for .pem, .crt, or .cer files. |
As you paste or load PEM content, the editor validates the format and shows a Certificate Details preview with a fingerprint summary. A note reads: "Note: Full certificate details (subject, validity dates) will be parsed by the runtime."
The validation messages surfaced in the UI include:
- "Certificate ID is required"
- "Certificate ID must be 64 characters or less"
- "Certificate ID can only contain letters, numbers, hyphens, and underscores"
- "A certificate with this ID already exists"
- "Certificate PEM content is required"
- "Certificate must start with '-----BEGIN CERTIFICATE-----'"
- "Certificate must end with '-----END CERTIFICATE-----'"
- "Certificate content appears to be too short"
- "Certificate contains invalid base64 content"
Click Add Certificate to save. Cancel discards the entry.
Certificate Card Layout
Once added, each entry in the list shows:
- A
📜icon and the Certificate ID. - A Delete button on the right.
- Subject, validity range, and fingerprint when available.
Removing a Trusted Certificate
Click Delete on the row to remove it. If the certificate is currently bound to a user, the user account becomes invalid and the editor blocks the removal. Unbind the user on the Users tab first.
Recommended Practice
| Environment | Server Certificate | Trusted Client Certificates |
|---|---|---|
| Development on a single workstation | Auto-generate Self-Signed | Optional |
| Lab testing across two devices | Auto-generate Self-Signed, accept on first connect | Add the engineering workstation's client certificate |
| Production | Custom certificate signed by your CA | One trusted entry per certificate-authenticated client |
Rotate custom certificates before they expire. Once a server certificate expires, clients will refuse to connect until a new one is uploaded and the runtime is restarted.
What's Next?
- Users: bind a trusted certificate to a user account so that client can log in.
- Security Profiles: enable
Certificateauthentication in the profile you want clients to use. - Address Space: choose what variables the certificate-bound users can access.
On This Page