Variables & Data Types
Variables are how your PLC program stores and communicates data. Every input signal, output command, intermediate calculation, and configuration value is represented as a variable. IEC 61131-3 defines a rich system of variable classes (which determine scope and direction) and data types (which determine what kind of data a variable holds).
Variable Classes
A variable's class determines its scope and how it interacts with the POU that declares it. The following classes are available:
Local
Local variables are internal to the POU. They're not visible outside and retain their values between execution cycles (for Programs and Function Blocks). Use local variables for intermediate calculations, internal state, counters, flags, and any data that doesn't need to cross POU boundaries.
Input
Input variables receive values from outside the POU. When a POU is called, the caller provides values for its input variables. Inside the POU, input variables are read-only.
For Programs, input variables can also be mapped to physical input addresses (e.g., %IX0.0 for a digital input or %IW3 for an analog input word).
Output
Output variables send values out of the POU to the caller. After a POU executes, the caller can read the output variable values. Inside the POU, output variables are read-write.
For Programs, output variables can be mapped to physical output addresses (e.g., %QX0.0 for a digital output or %QW2 for an analog output word).
InOut
InOut variables (also called VAR_IN_OUT) are passed by reference. The caller provides an existing variable, and the POU can both read and modify it. Changes made inside the POU are reflected in the caller's variable. This is useful when a POU needs to update a value in-place.
In Ladder and FBD, an InOut appears as a single pin on the input side of the block, with a ⟷ marker after its name, and it accepts one connection. There is no separate output pin: the POU writes back through the variable you connected, so that variable holds the updated value once the call returns. See Variable classes inside a POU for the details and for converting diagrams drawn before this change.
External
External variables reference global variables declared in the Resource configuration. When a POU declares a variable with the external class, it's accessing a global variable by name. Any changes are visible to all POUs that reference the same global.
Temp
Temporary variables exist only for the duration of a single POU execution cycle. Unlike local variables, temp variables aren't guaranteed to retain their values between cycles. Use them for scratch calculations within a single scan.
Global
Global variables are declared in the Resource configuration (not inside a POU). They're accessible from any POU in the project via the external class. Global variables are used for data sharing between POUs. For example, a setpoint value that multiple programs need to read, or a status flag that one program writes and another reads.
Global variables are managed in the Global Variables table of the Resource editor. See Global Variables for details.
Declaring Variables in the IDE
Each POU has a Variables Table at the top of its editor. The table shows all variables with the following columns:
| Column | Description |
|---|---|
| Name | The variable identifier. Must be a valid IEC 61131-3 identifier (letters, digits, underscores; cannot start with a digit). |
| Class | The variable class (input, output, inOut, external, local, temp). Select from a dropdown. |
| Type | The data type. A base type, user-defined type, array type, or function block instance. |
| Location | The I/O address for hardware-mapped variables (e.g., %IX0.0, %QW3, %MD10). Leave blank for non-located variables. |
| Initial Value | The value the variable starts with when the PLC starts. Optional. |
| Documentation | A free-text description of the variable's purpose. Optional but recommended. |
| Debug | A checkbox that flags the variable for debugging/monitoring. |
To add a variable, use the + button above the table. To remove, select a row and use the − button. You can also reorder variables using the up/down arrow buttons.
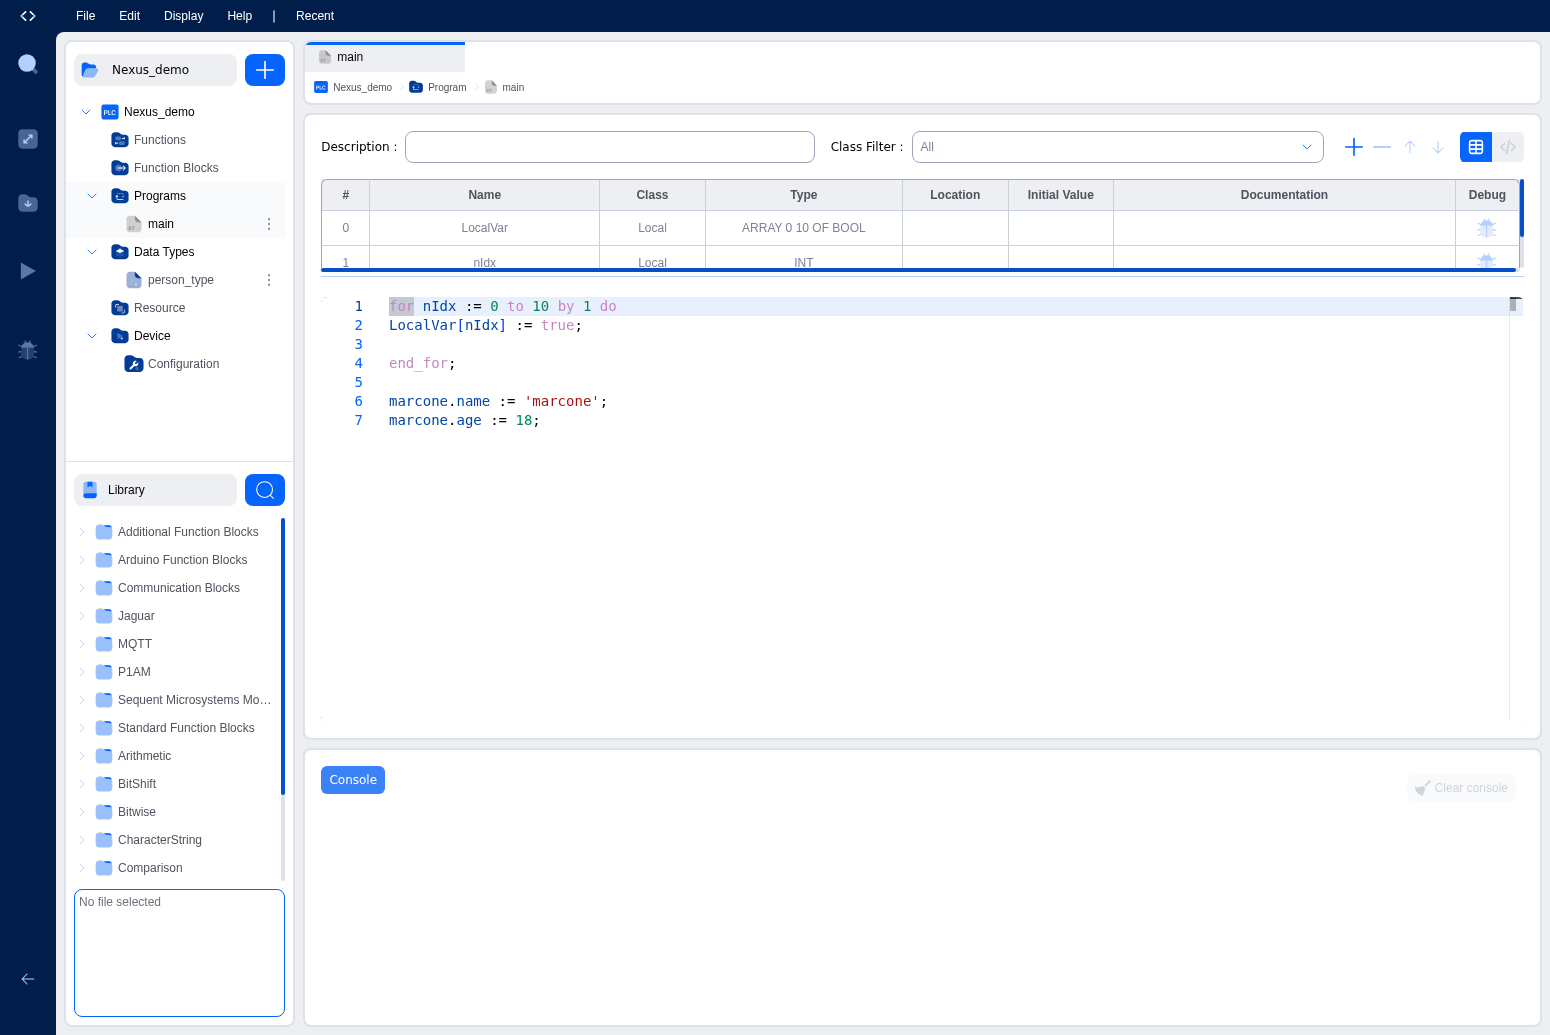
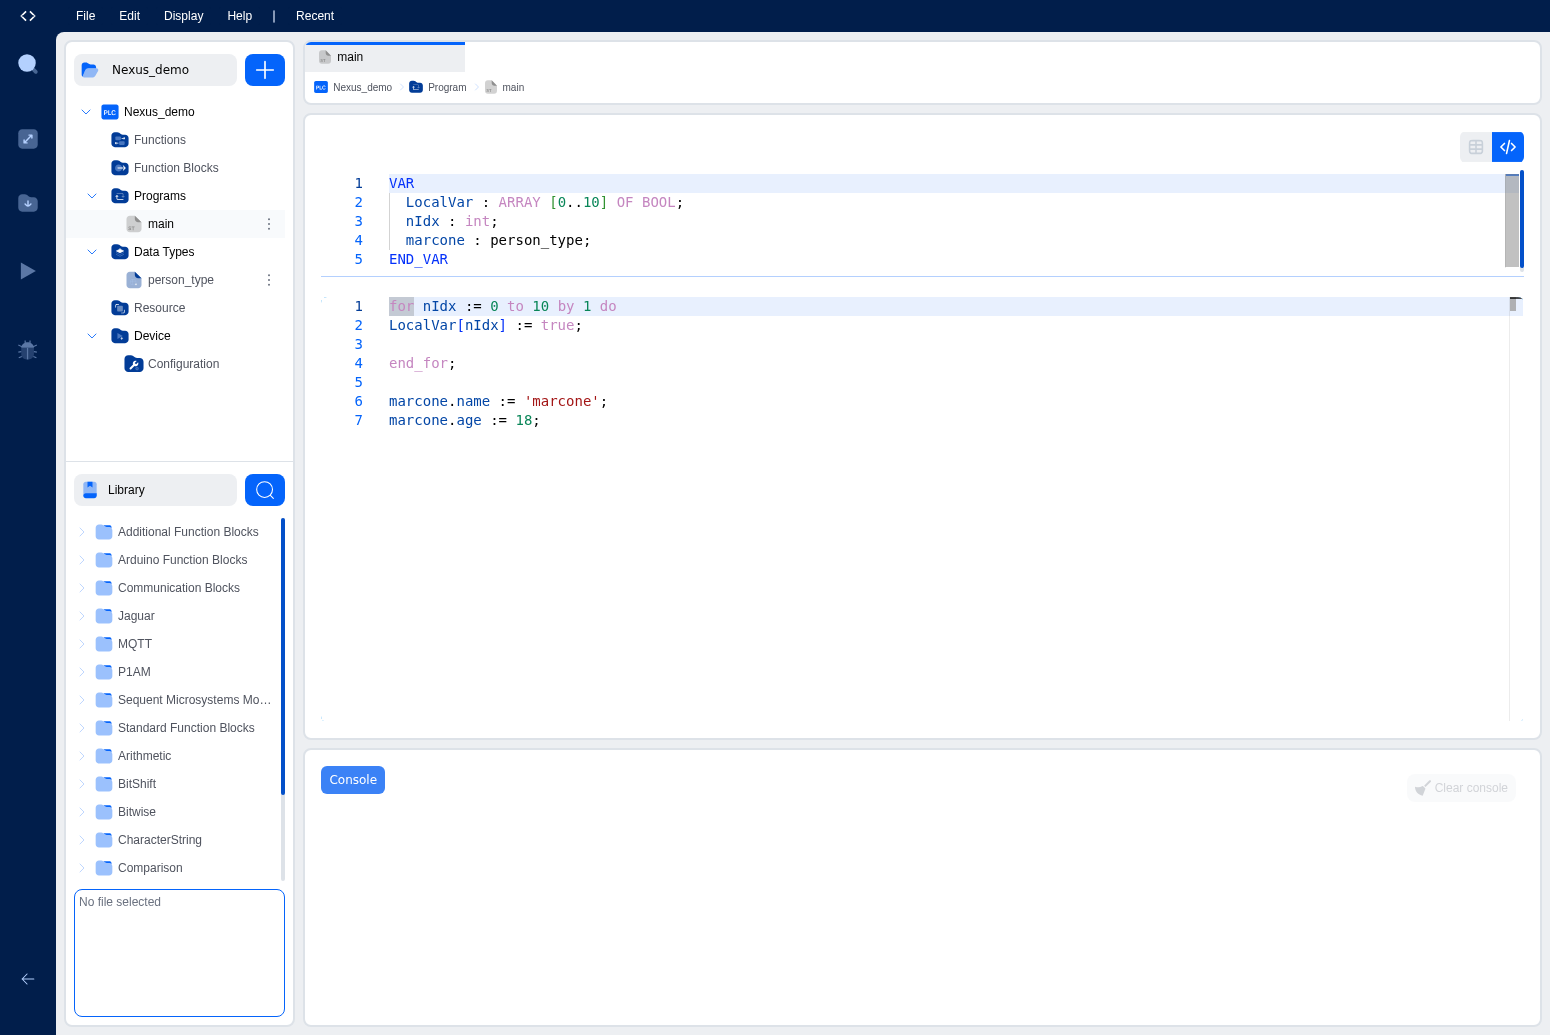
The IDE also supports a text mode for declaring variables in standard IEC 61131-3 syntax (VAR ... END_VAR). Toggle between graphical and text mode using the buttons above the table. Text mode is handy if you prefer typing declarations directly or pasting from existing code.
Base Data Types
IEC 61131-3 defines a set of elementary data types. Here's the complete reference:
Boolean
| Type | Description | Size |
|---|---|---|
| BOOL | Boolean value (TRUE / FALSE, or 1 / 0) | 1 bit |
Integer Types (Signed)
| Type | Description | Range |
|---|---|---|
| SINT | Short integer | −128 to 127 |
| INT | Integer | −32,768 to 32,767 |
| DINT | Double integer | −2,147,483,648 to 2,147,483,647 |
| LINT | Long integer | −2^63 to 2^63 − 1 |
Integer Types (Unsigned)
| Type | Description | Range |
|---|---|---|
| USINT | Unsigned short integer | 0 to 255 |
| UINT | Unsigned integer | 0 to 65,535 |
| UDINT | Unsigned double integer | 0 to 4,294,967,295 |
| ULINT | Unsigned long integer | 0 to 2^64 − 1 |
Floating Point
| Type | Description | Precision |
|---|---|---|
| REAL | Single-precision float | ~7 decimal digits |
| LREAL | Double-precision float | ~15 decimal digits |
Time and Date
| Type | Description | Example |
|---|---|---|
| TIME | Duration | T#5s, T#100ms, T#1h30m |
| DATE | Calendar date | D#2026-03-14 |
| TOD | Time of day | TOD#14:30:00 |
| DT | Date and time combined | DT#2026-03-14-14:30:00 |
String
| Type | Description | Max Length |
|---|---|---|
| STRING | Character string | 126 characters (default) |
Bit String Types
| Type | Description | Size |
|---|---|---|
| BYTE | 8-bit string | 8 bits |
| WORD | 16-bit string | 16 bits |
| DWORD | 32-bit string | 32 bits |
| LWORD | 64-bit string | 64 bits |
Bit string types are used for bitwise operations, packed flags, and direct memory manipulation. They represent bit patterns rather than numeric values.
User-Defined Data Types
Beyond the base types, you can create your own data types in the Data Types branch of the Project Explorer. The IDE supports three kinds:
Arrays
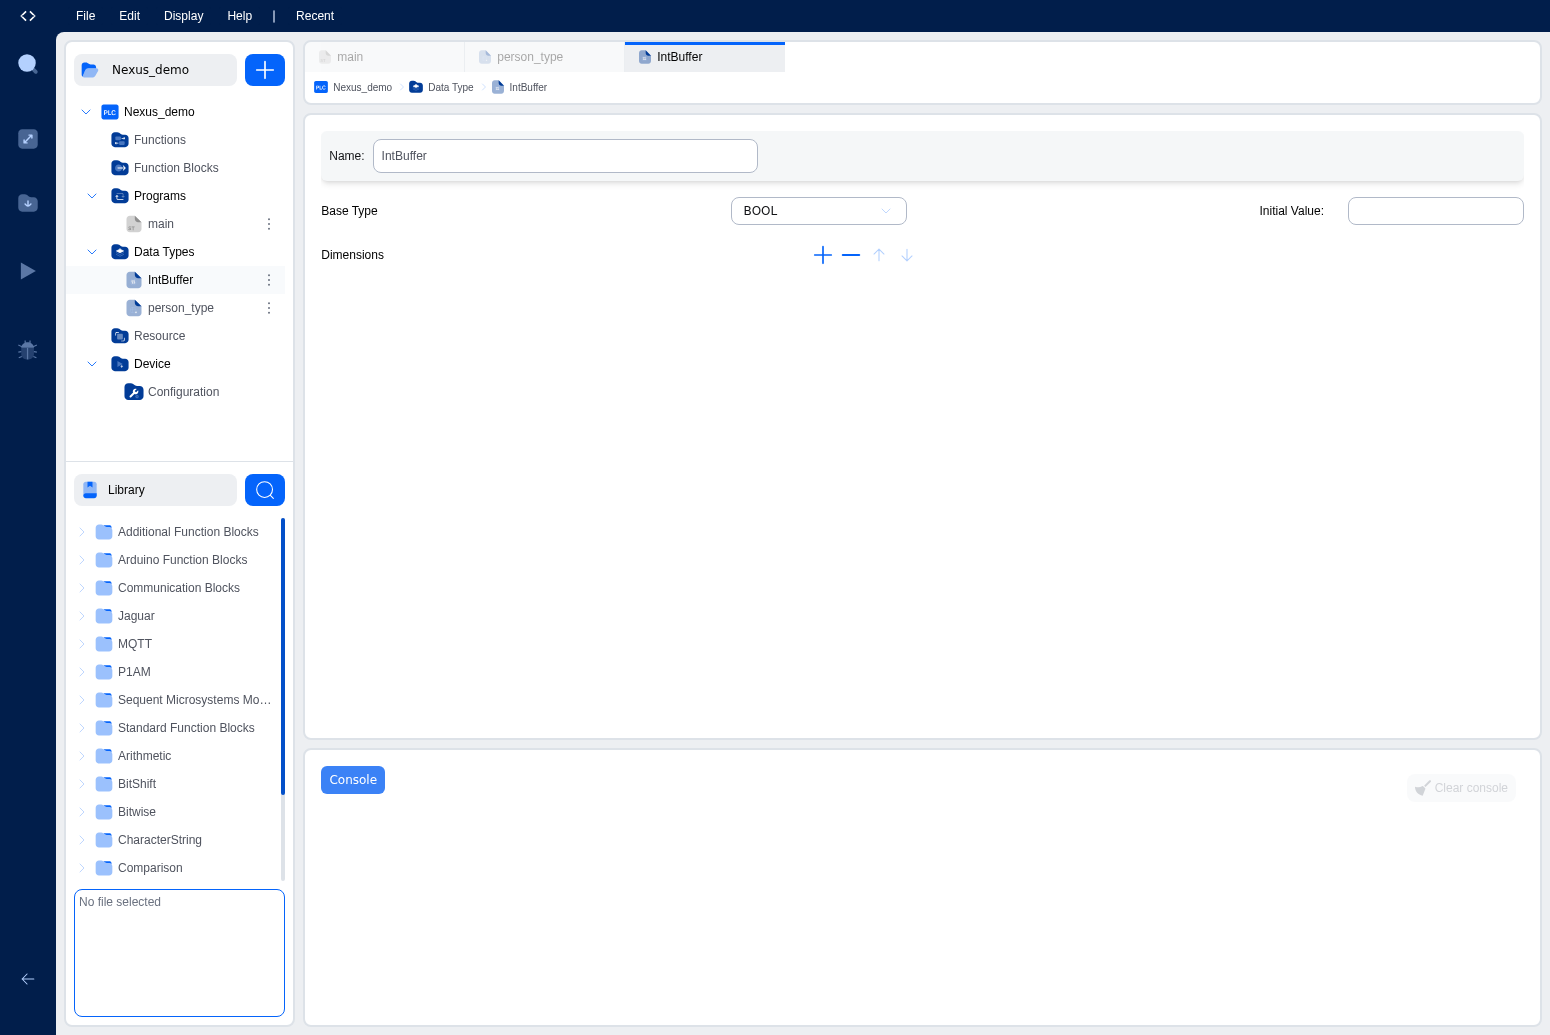
An array type defines an ordered collection of elements, all of the same base type. You specify the base type and one or more dimensions, each with a range (e.g., 0..9 for a 10-element array).
Example: An array TenTemperatures with base type REAL and dimension 0..9 creates a type that holds 10 real numbers. Arrays are useful for sensor banks, recipe tables, or any data set with multiple values of the same type.
Enumerations
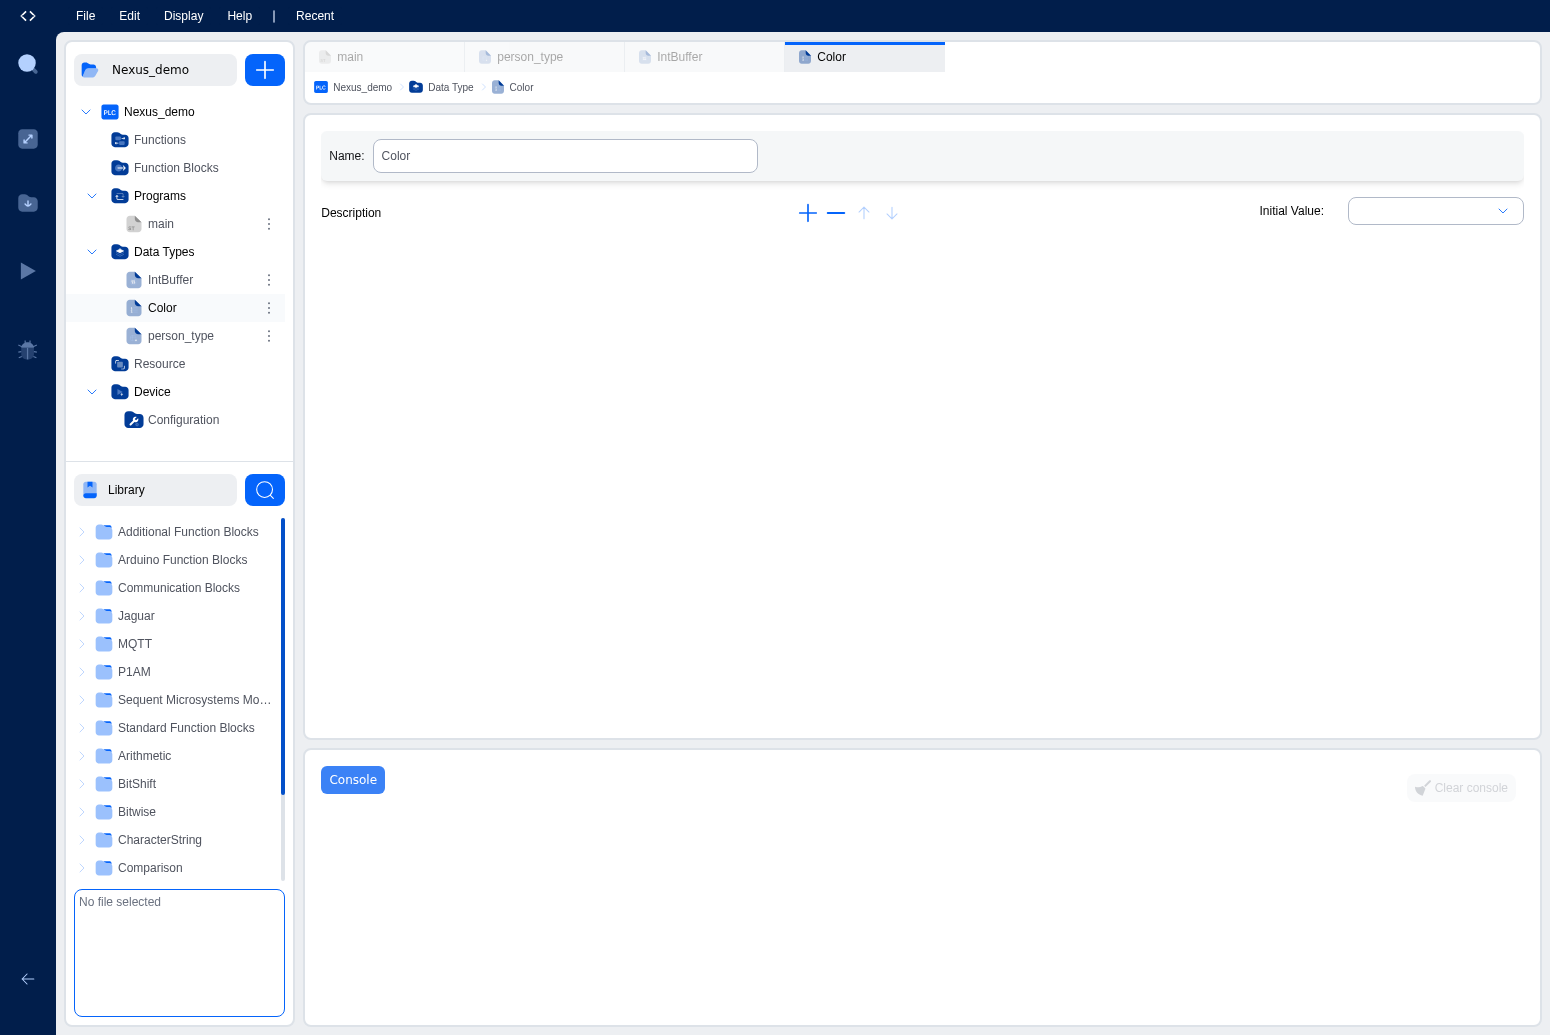
An enumerated type defines a set of named values. Any variable of this type can hold exactly one of those values.
Example: An enumeration MachineState with values IDLE, RUNNING, PAUSED, FAULTED. Enumerations make your code more readable and less error-prone compared to using raw integer codes.
Structures
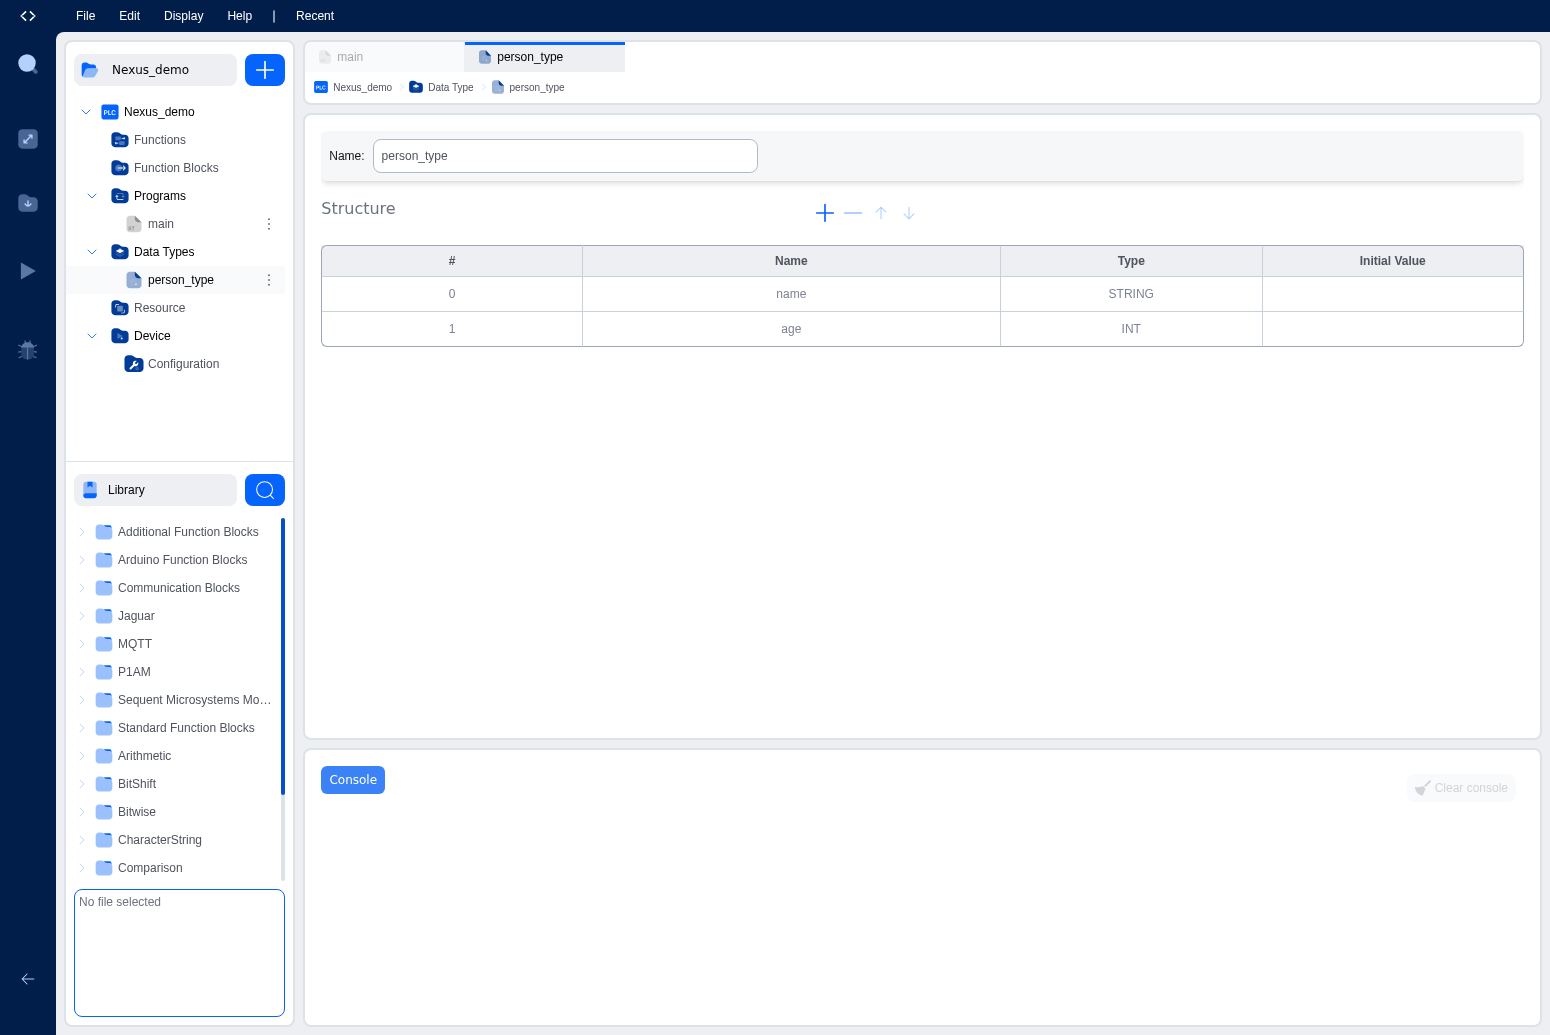
A structure type groups multiple named fields of potentially different types into a single composite type. Each field has its own name and type.
Example: A structure SensorData with fields:
Value : REALValid : BOOLTimestamp : DTSensorId : INT
Structures are useful for organizing related data. Sensor readings with metadata, motor parameters, recipe configurations, etc.
Creating a Data Type
- Click the + button next to the project name in the Project Explorer.
- Choose to create a Data Type.
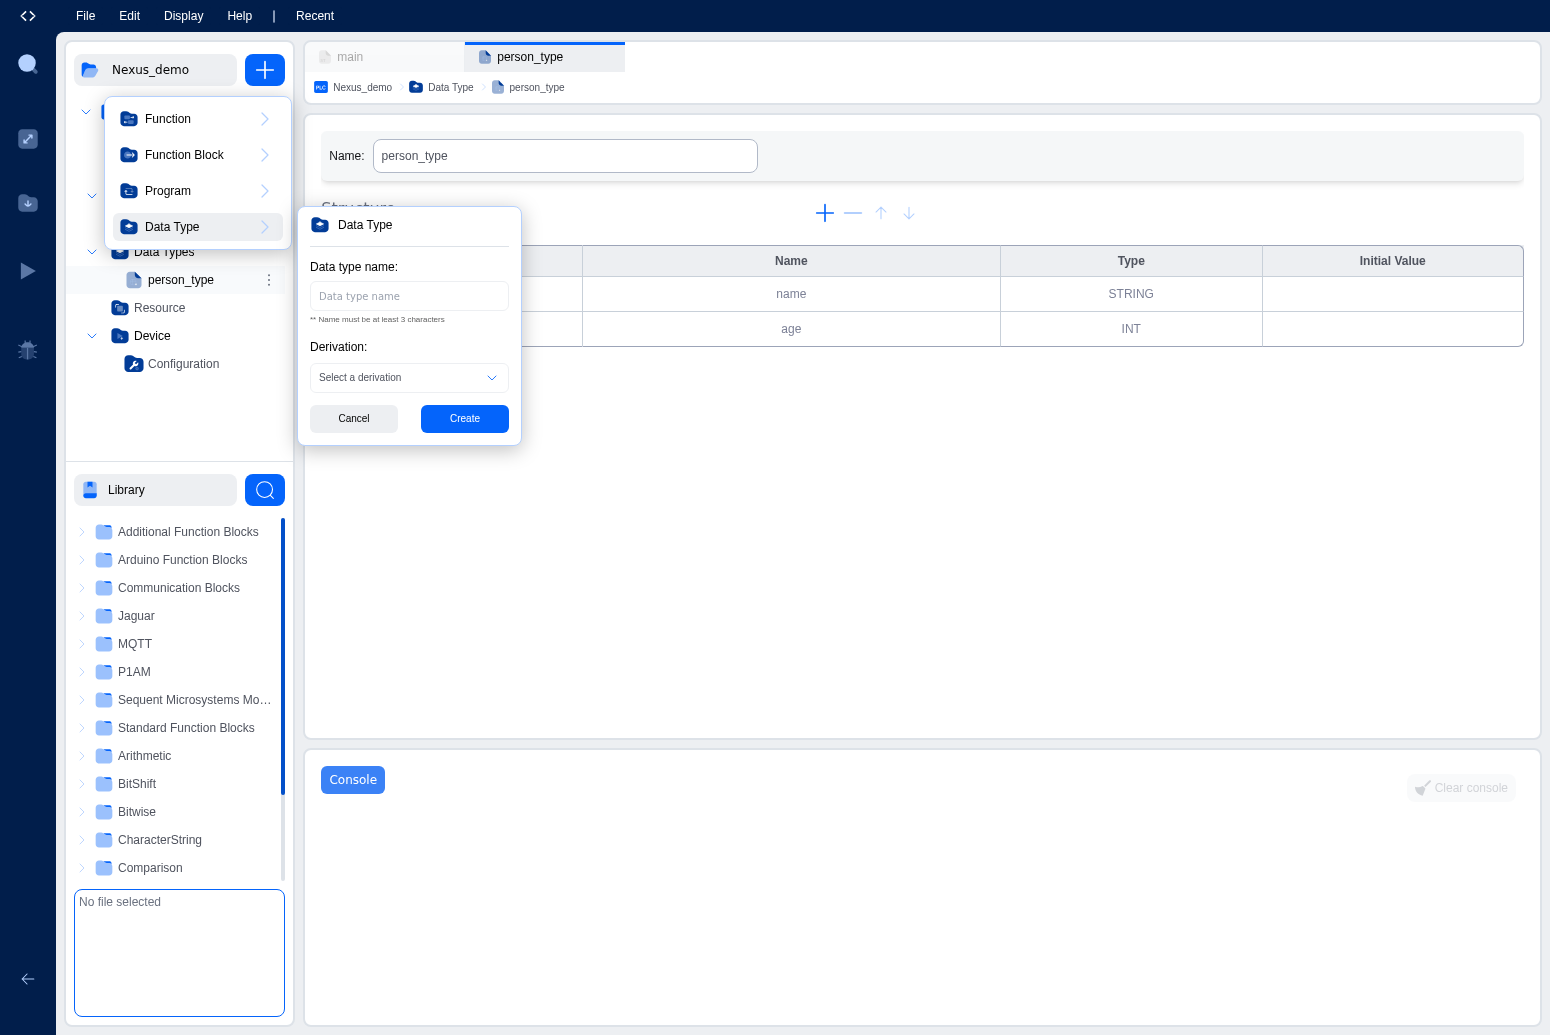
- Enter a name and select the derivation: Array, Enumeration, or Structure.
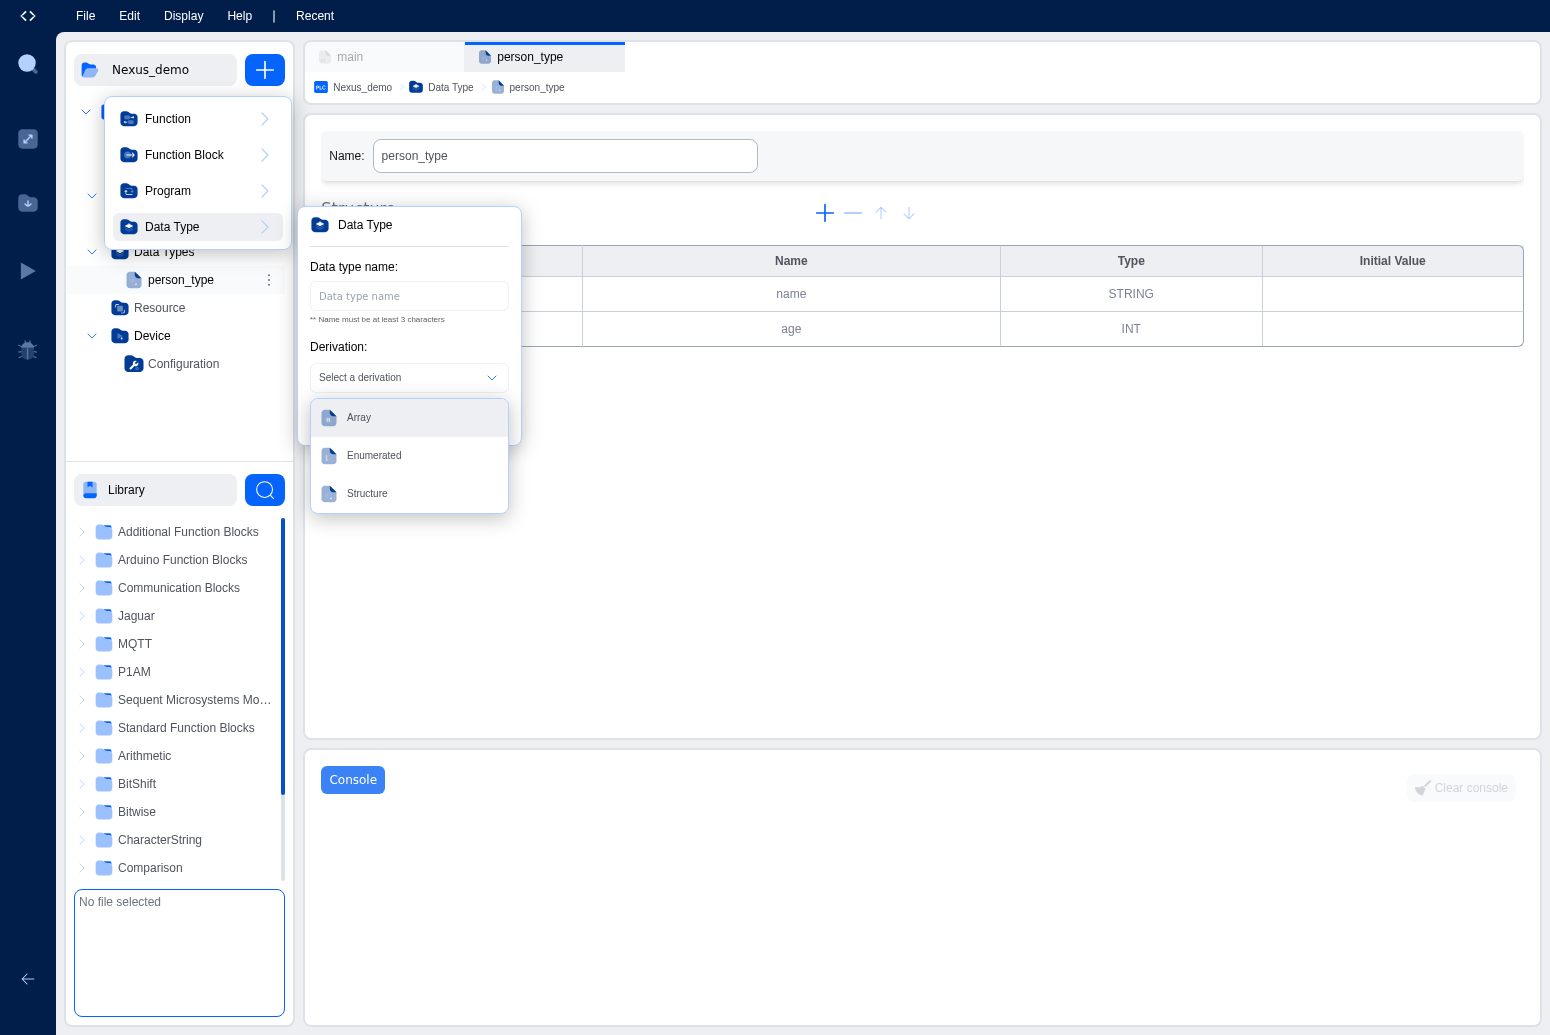
- Click Create.
- The data type appears in the Data Types branch. Click it to open its editor.
- Configure the type details (base type and dimensions for arrays, values for enumerations, fields for structures).
For arrays, the editor lets you set the base type, an optional initial value, and one or more dimensions:
For enumerations, you fill in the value table and pick an initial value:
For structures, you define the fields and their types:
User-defined types are available in the type dropdown when declaring variables in any POU.
I/O Addressing
Variables can be mapped to physical I/O addresses using the IEC 61131-3 location syntax in the Location column of the Variables Table. The addressing format is:
code%<prefix><size><address>
Where:
-
Prefix indicates direction:
I: Input (read from physical input)Q: Output (write to physical output)M: Memory (internal memory, not tied to physical I/O)
-
Size indicates data width:
X: Bit (single boolean)B: Byte (8 bits)W: Word (16 bits)D: Double word (32 bits)L: Long word (64 bits)
-
Address is the numeric address, often with dot notation for bit addressing:
%IX0.0: Input bit 0 of byte 0%QX1.3: Output bit 3 of byte 1%IW2: Input word 2%QW0: Output word 0%MD10: Memory double word 10
Example Locations
| Location | Meaning |
|---|---|
%IX0.0 | Digital input, byte 0, bit 0 |
%IX0.1 | Digital input, byte 0, bit 1 |
%QX0.0 | Digital output, byte 0, bit 0 |
%IW0 | Analog input word 0 |
%QW0 | Analog output word 0 |
%MW5 | Internal memory word 5 |
%MD2 | Internal memory double word 2 |
Tip: When in doubt about which data type to use, start with INT for whole numbers, REAL for decimals, and BOOL for on/off values. You can always refine later.
What's Next?
Learn how tasks and instances control when your programs execute: Tasks & Instances.
On This Page