Creating a Library
Beyond using the libraries that ship with the editor, you can author your own and share it with other projects (and other people). A library is a special kind of project: instead of a runnable PLC program, it is a collection of reusable functions, function blocks, and data types that compiles into a single .stlib archive. Any other project can then install that archive and drop your blocks straight into its logic.
This page walks through the full authoring flow end to end: creating the library project, filling in its manifest, adding a function and a function block, and compiling the .stlib. The example library, Demo Utils Library, contains two reusable blocks: an AnalogScale function and a MovingAverage function block.
1. Create a library project
From the dashboard, click + New. The New Project wizard opens on the Project Type step. Choose Library (the second card) rather than PLC Project, then click Next.
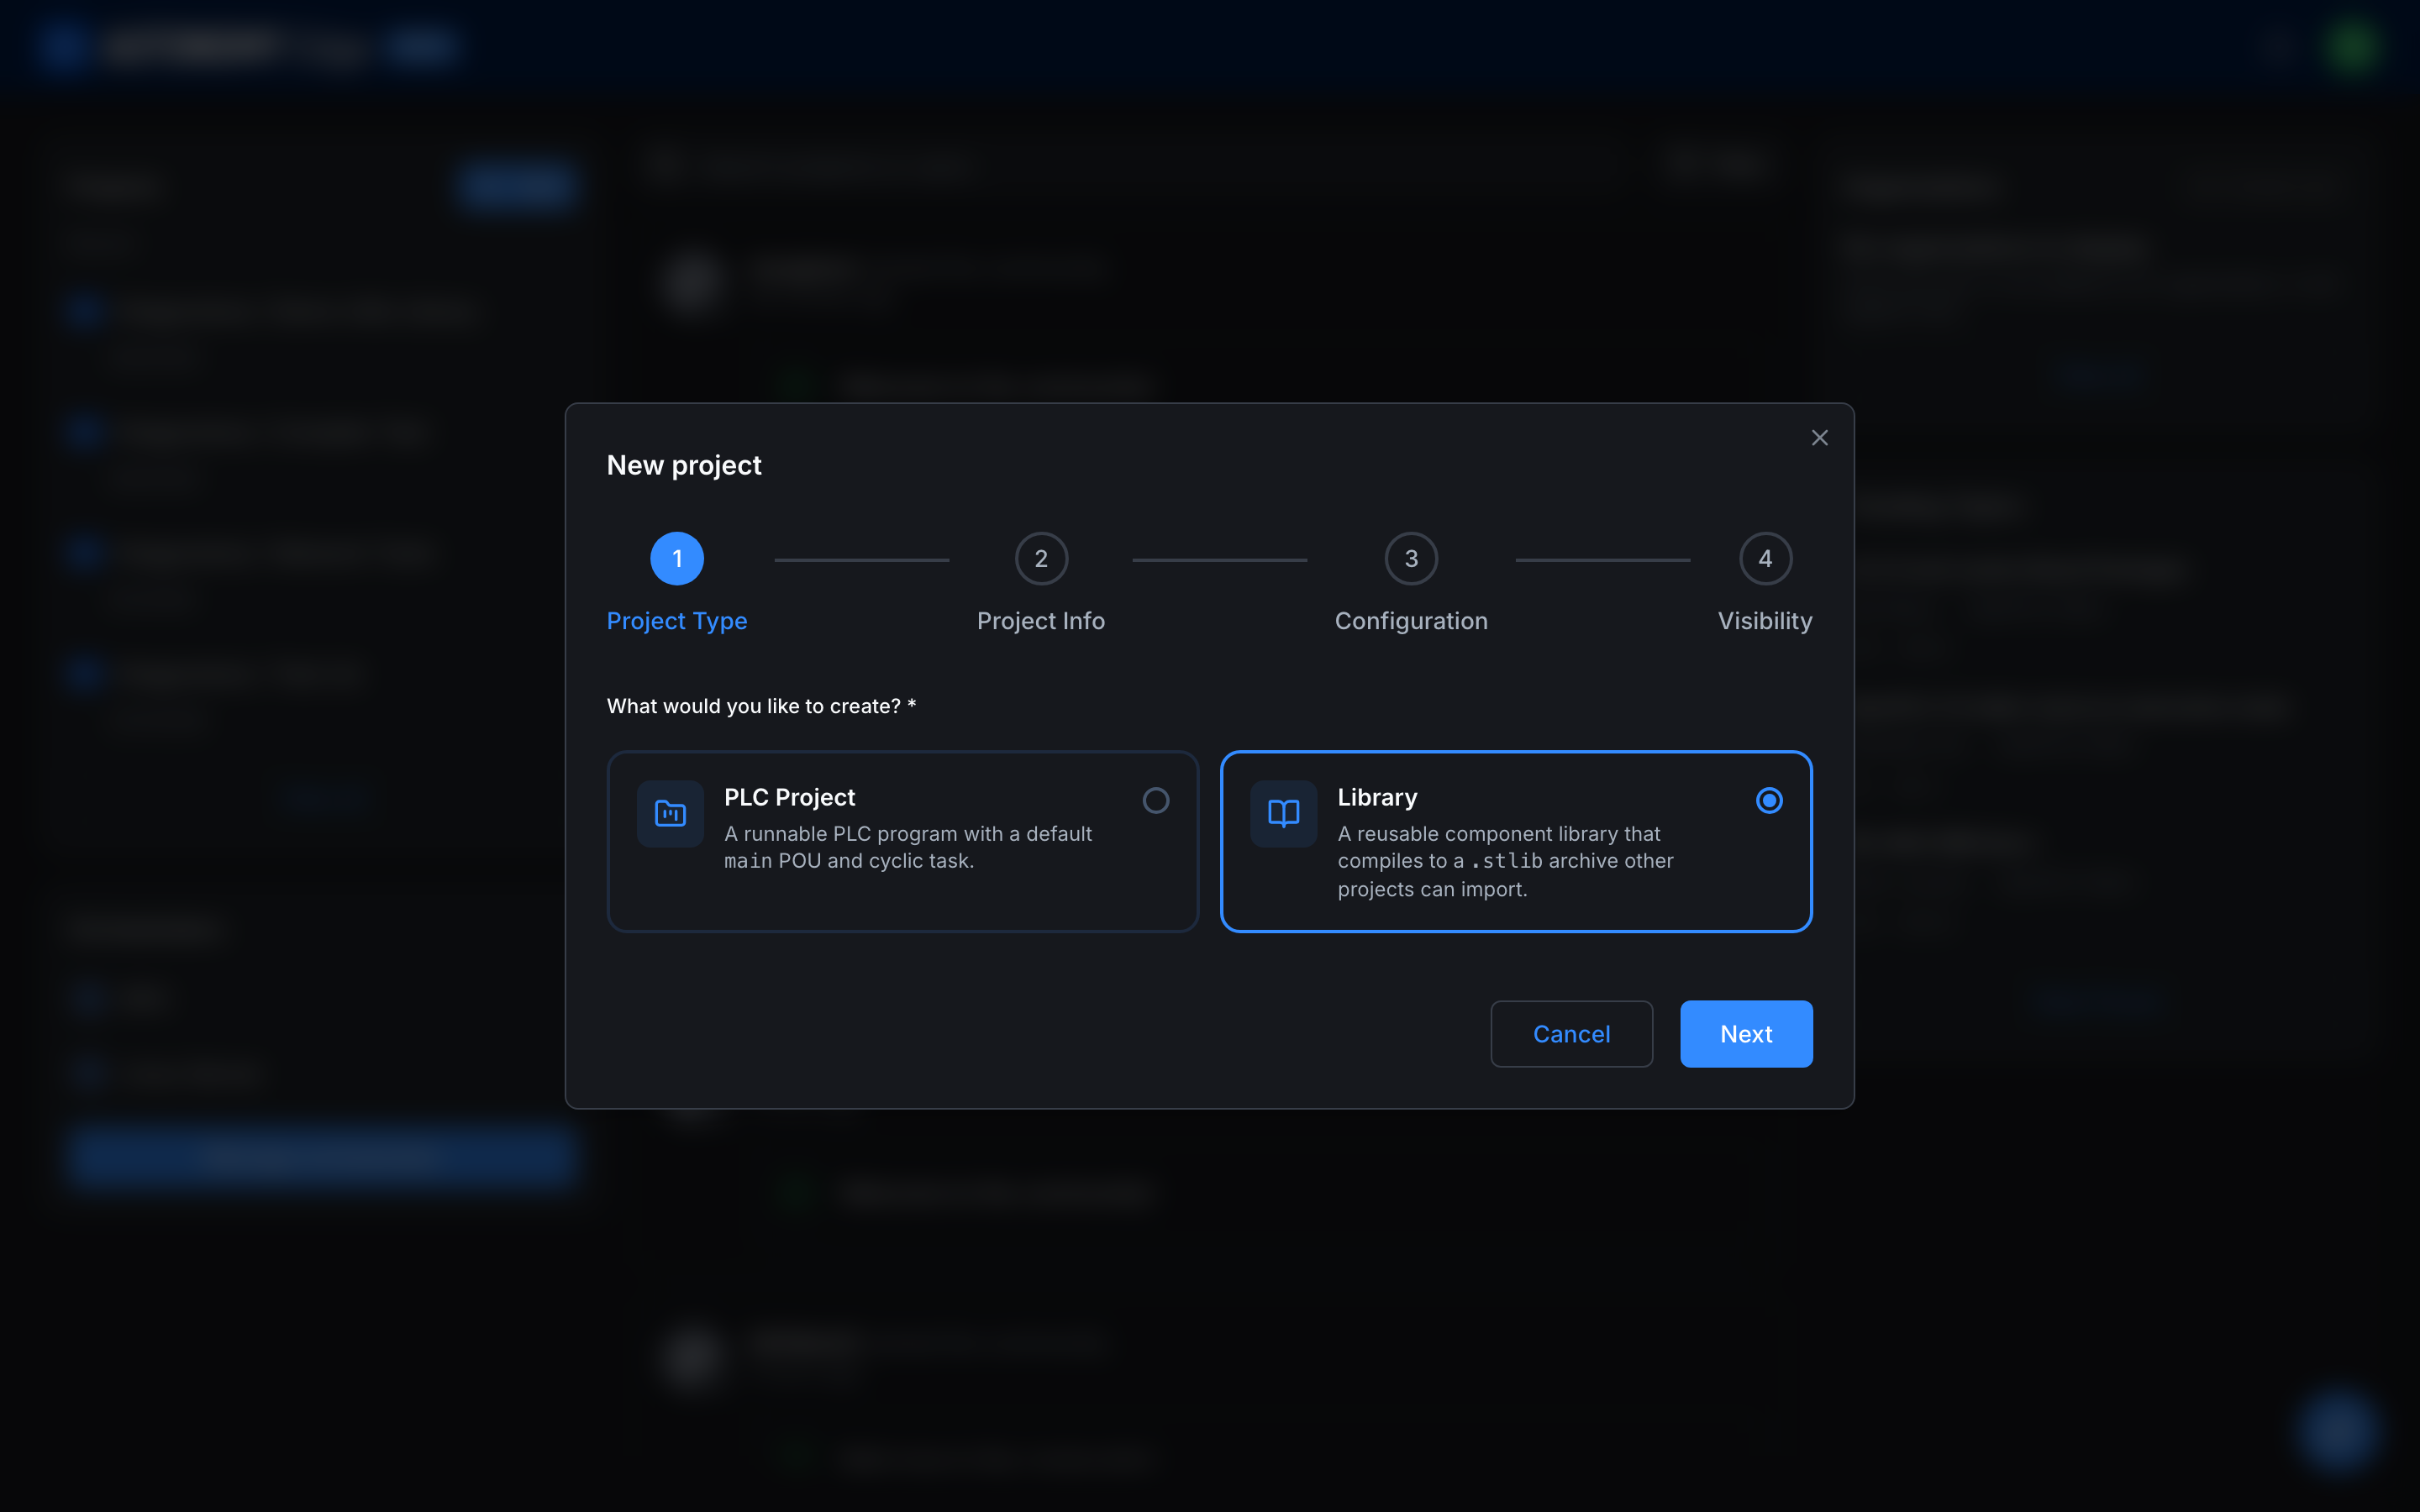
A library skips the Configuration step a PLC project has (there is no board, cycle time, or programming language to choose, because a library is never run on its own). You only fill in:
- Project Info: the project name, the folder it lives in, and an optional description.
- Visibility: Private (only you and invited collaborators) or Public (anyone with the link). Visibility controls who can see the project; it is independent of publishing the compiled library to the catalogue, which is a separate, explicit step described in Publishing a Library.
Click Create Project. The project page opens with a small set of files already in place: a functions/ folder, a function-blocks/ folder, a devices/ folder, and a library.json manifest.
2. Open the library in the editor
Click Open in editor on the project page. The library workspace looks like a trimmed-down version of a normal PLC project:
The project tree has four nodes and no Resource section (a library has no tasks or instances, because it is never executed directly):
| Node | What it holds |
|---|---|
| Manifest | The library.json metadata file (name, version, description). |
| Functions | Stateless functions the library exposes. |
| Function Blocks | Stateful function blocks the library exposes. |
| Data Types | Custom structures, enumerations, and arrays the blocks use. |
3. Fill in the manifest
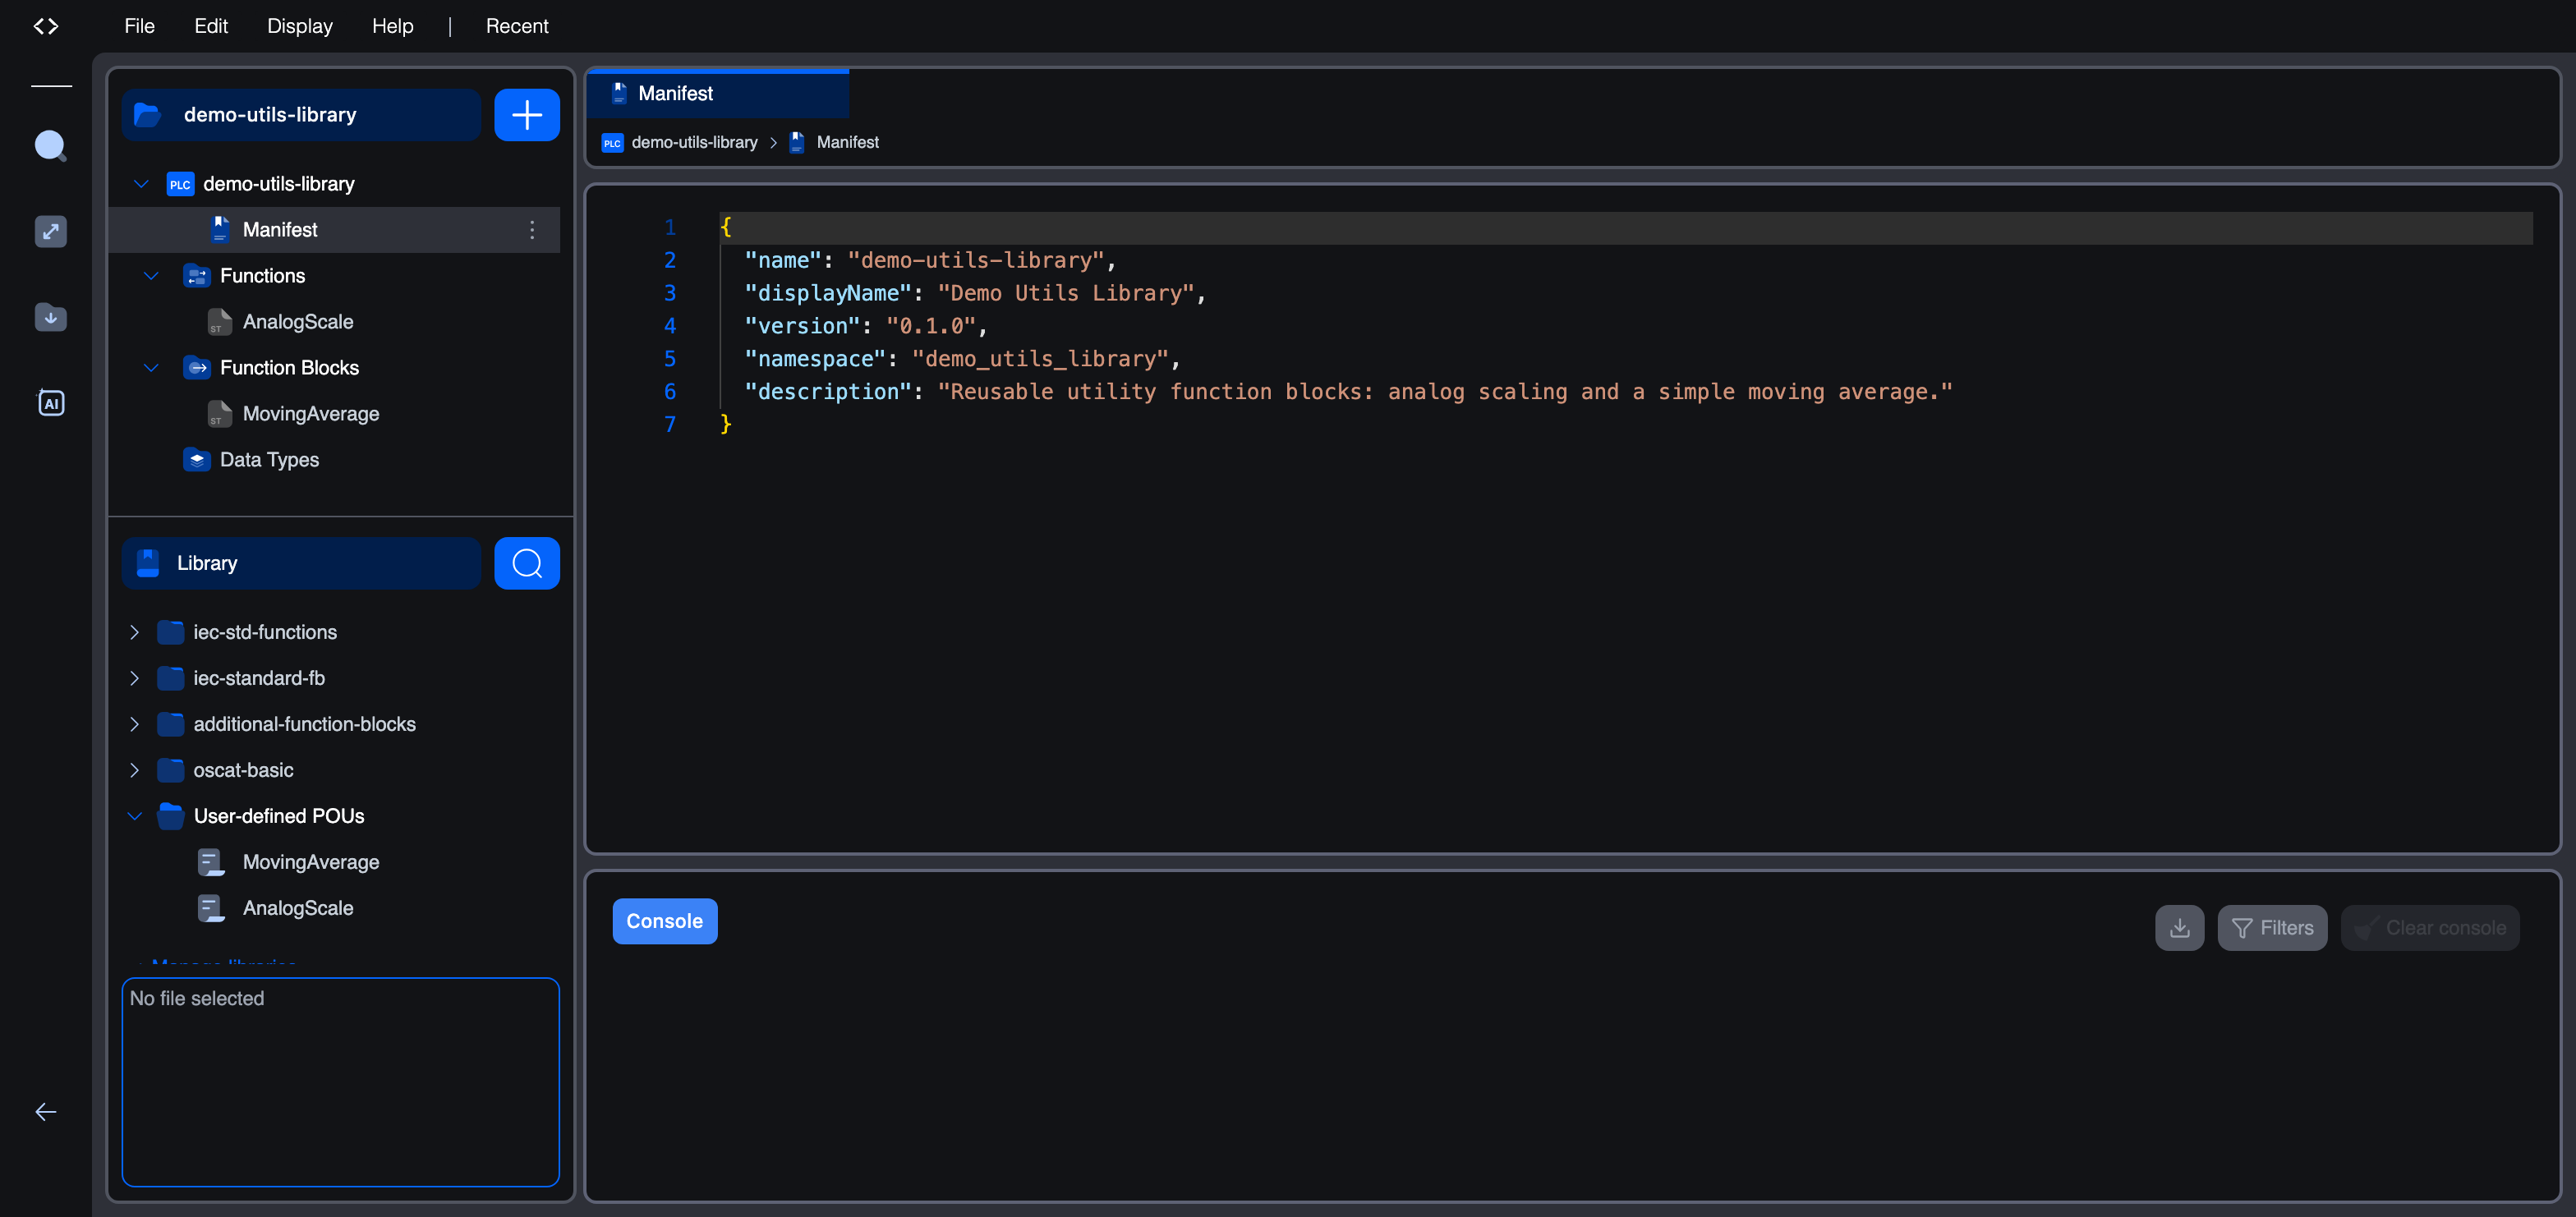
Click Manifest to open library.json. It is a small JSON file that describes the library:
json{
  "name": "demo-utils-library",
  "displayName": "Demo Utils Library",
  "version": "0.1.0",
  "namespace": "demo_utils_library",
  "description": "Reusable utility function blocks: analog scaling and a simple moving average."
}
| Field | Meaning |
|---|---|
name | The library's machine identifier (lower-case, hyphenated). Used to match and de-duplicate libraries. |
displayName | The friendly name shown in the catalogue and the Library Manager. |
version | The library's semantic version. This is the version that is published; bump it before each new publication. |
namespace | A prefix that keeps this library's types from clashing with identically named types in other libraries. |
description | A one-line summary shown in the public catalogue. |
Edit the values to suit your library, then save the whole project with File → Save Project (Ctrl/Cmd + Shift + S).
Tip: Save the library with Save Project (Ctrl/Cmd + Shift + S), which commits every file (the manifest, the functions, and the function blocks) in one step.
4. Add functions and function blocks
Click the + button at the top of the project tree. The menu offers Function, Function Block, and Data Type. There is no Program option, because a library does not run.
Choosing Function or Function Block opens a small form: give the POU a name (CamelCase, PascalCase, or snake_case) and pick a language. Functions can be written in Ladder, Structured Text, Instruction List, or Function Block Diagram. Function blocks add Python and C/C++ to that list.
Function vs. function block: which to use?
The difference matters when you design a library:
- A function is stateless. It takes inputs, returns a single value, and remembers nothing between calls. Use it for pure calculations. A function declares a return type (shown as the Return type selector at the top of its editor).
- A function block is stateful. It can keep local variables that persist from one call to the next, and it exposes named outputs instead of a single return value. Use it for anything that accumulates, counts, times, or filters.
Example: the AnalogScale function
AnalogScale converts a raw integer reading into a percentage. It is a pure calculation, so it is a function with a REAL return type:
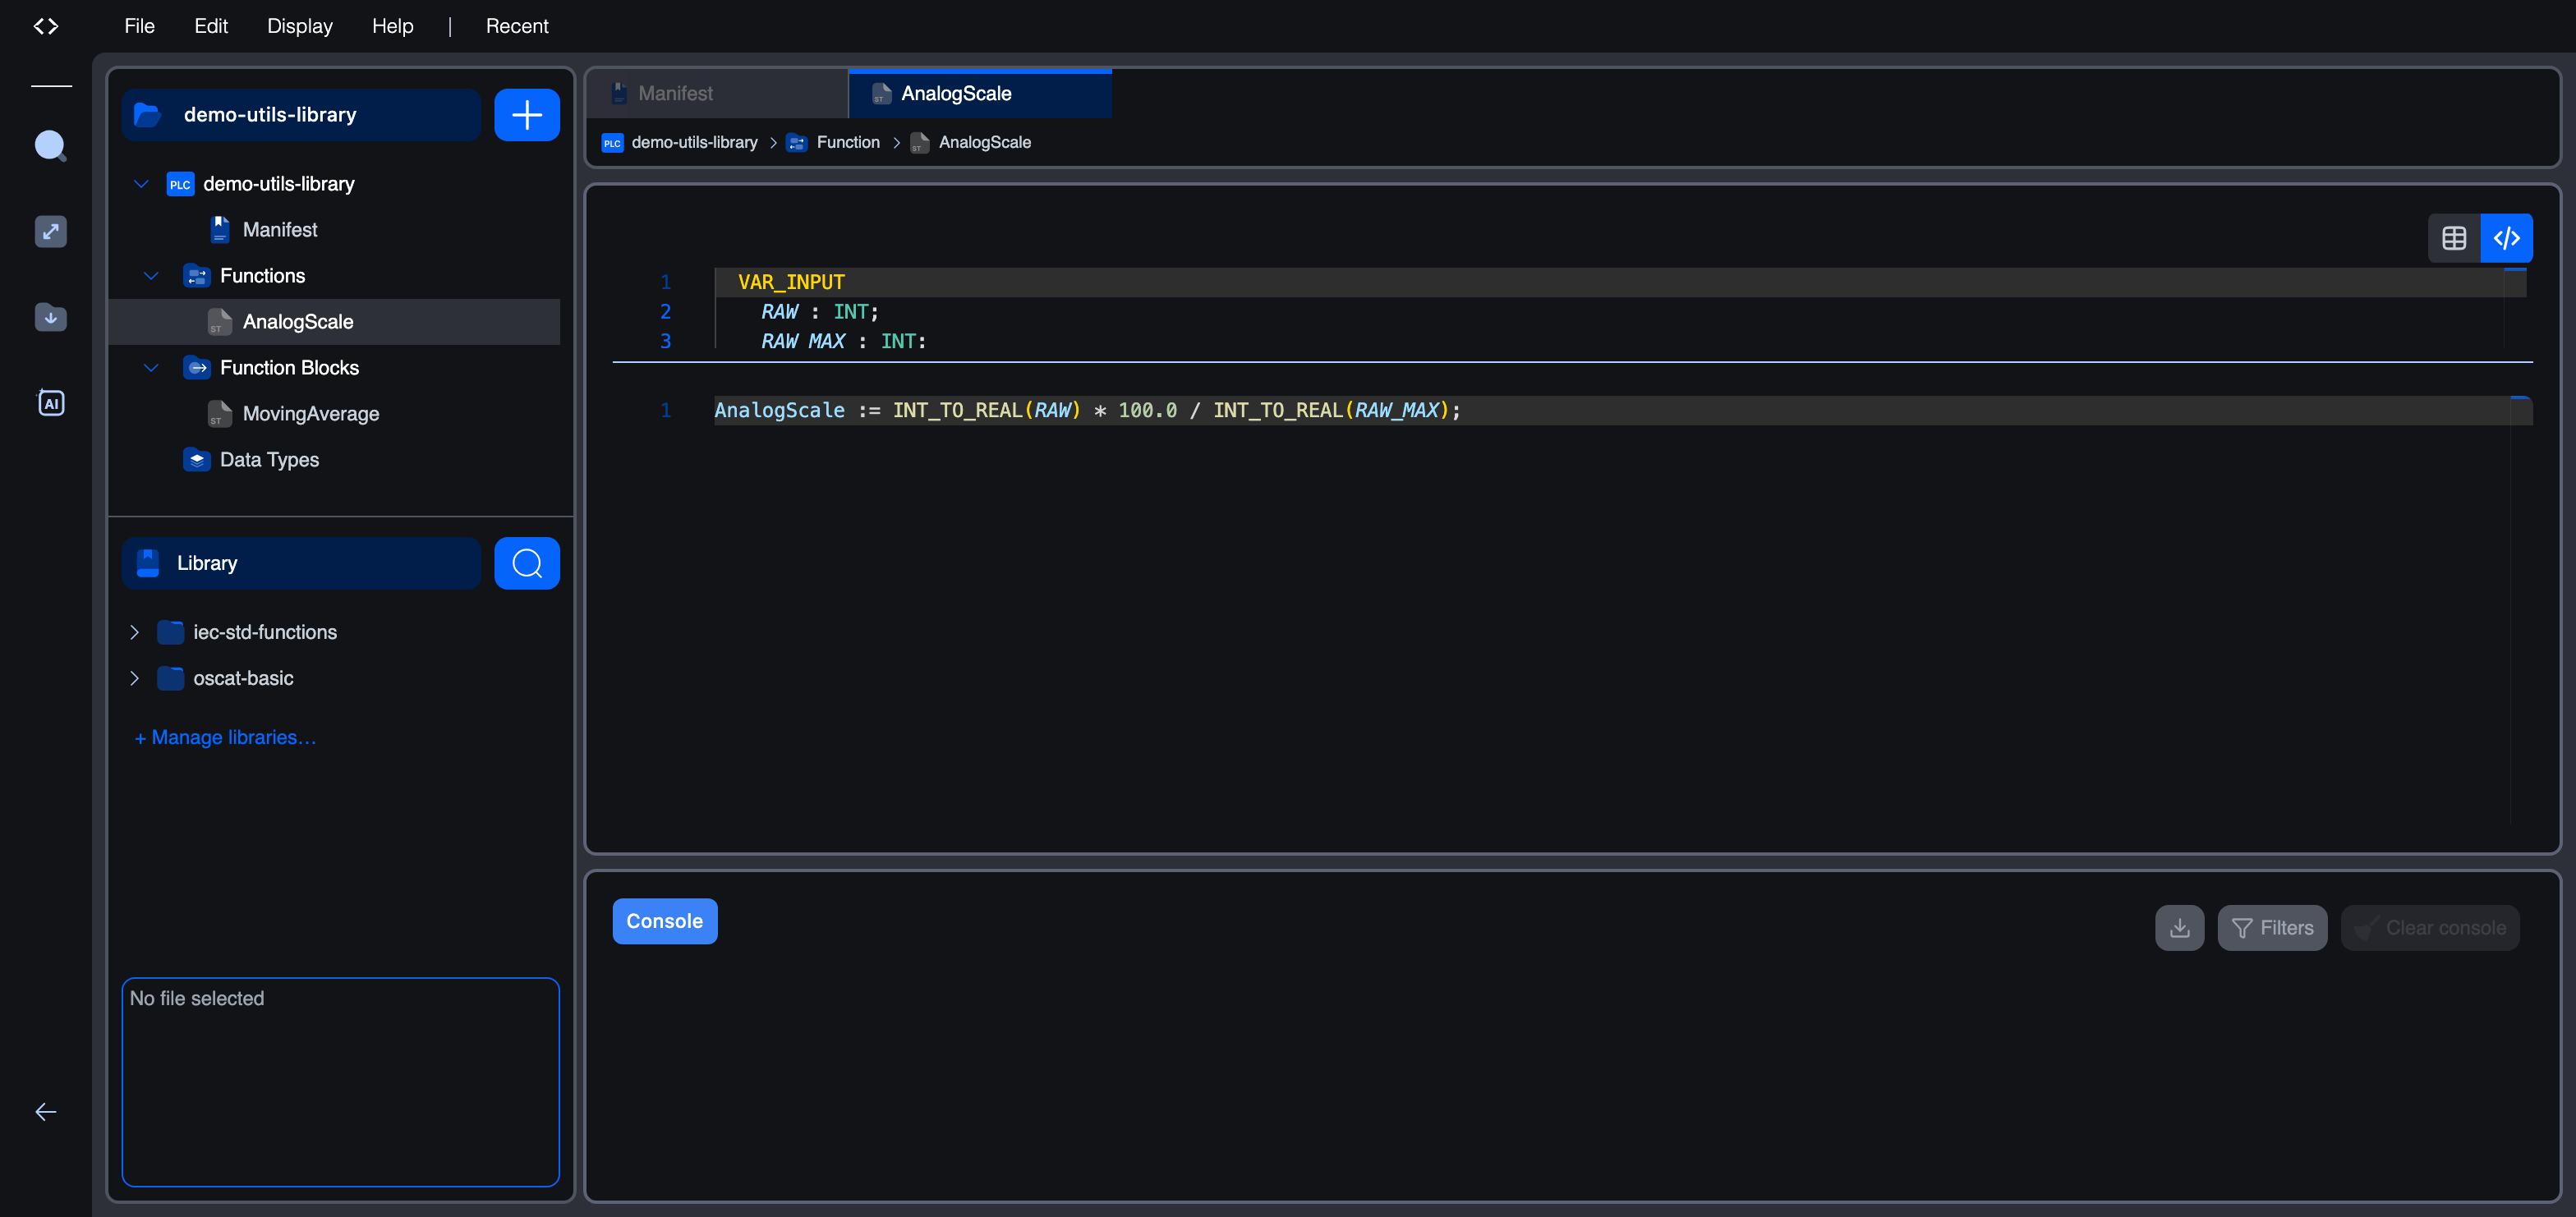
iecstVAR_INPUT
    RAW : INT;
    RAW_MAX : INT;
END_VAR
iecstAnalogScale := INT_TO_REAL(RAW) * 100.0 / INT_TO_REAL(RAW_MAX);
A function returns its result by assigning to its own name (AnalogScale := ...).
Example: the MovingAverage function block
MovingAverage keeps a running average across calls. Because it has to remember the running sum and the sample count between scans, it is a function block with SUM and COUNT as local variables:
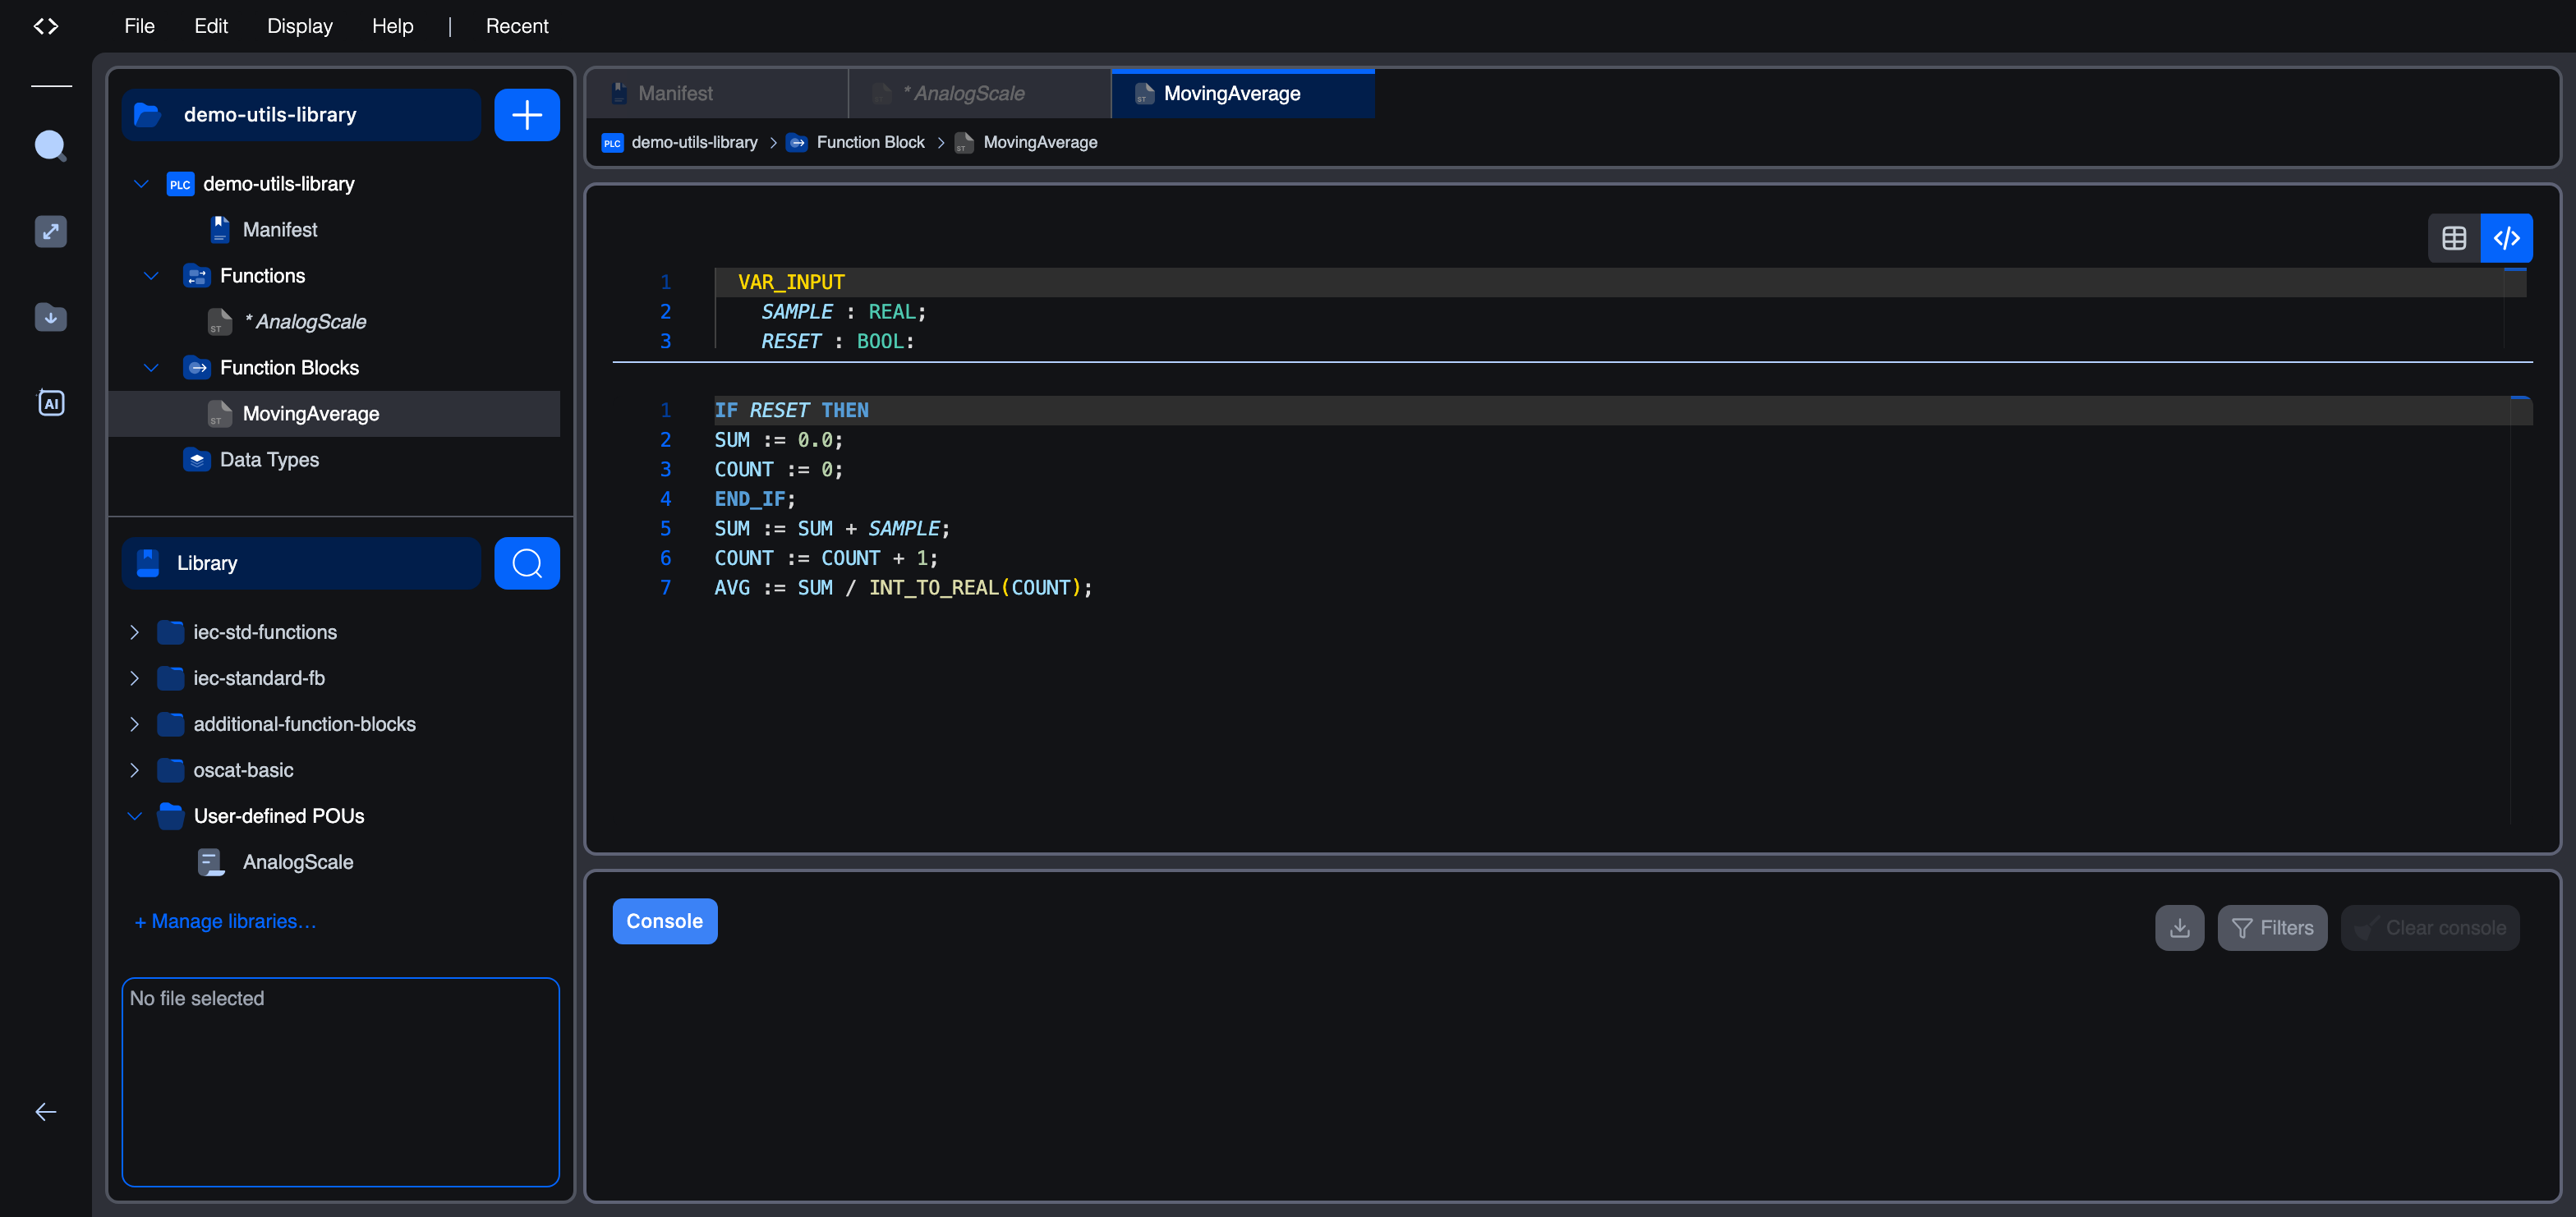
iecstVAR_INPUT
    SAMPLE : REAL;
    RESET : BOOL;
END_VAR
VAR_OUTPUT
    AVG : REAL;
END_VAR
VAR
    SUM : REAL;
    COUNT : INT;
END_VAR
iecstIF RESET THEN
    SUM := 0.0;
    COUNT := 0;
END_IF;
SUM := SUM + SAMPLE;
COUNT := COUNT + 1;
AVG := SUM / INT_TO_REAL(COUNT);
The SUM and COUNT locals are what make this a function block rather than a function: they survive between calls, so the average builds up over time.
Save the project (Ctrl/Cmd + Shift + S) whenever you finish editing.
5. Compile the library
When the blocks are ready, compile the library into its .stlib archive. Click the Build icon in the activity bar on the left. For a library the Build menu offers exactly two actions (there is no upload, because a library is not deployed to a runtime):
| Action | What it does |
|---|---|
| Build Library | Verifies the library and compiles it into a .stlib archive. |
| Clean Build | The same, but discards the verification cache and re-verifies from scratch. |
Choose Build Library. The editor first verifies the library by compiling it against the simulator, then packages the archive. The Console reports each step:
text[verify] Installing Arduino core...
[verify] Installing Arduino libraries...
[verify] Composing firmware bundle...
[verify] Compiling Arduino firmware...
[verify] Simulator firmware ready
Verification passed.
Compiling library archive...
Library built successfully: build/demo-utils-library.stlib
When the build finishes, the editor confirms success and offers to download the .stlib to your computer:

The compiled archive is also saved inside the project under build/demo-utils-library.stlib, so it travels with the project and is the exact file that gets published.
What's next
- Publishing a Library: share the compiled
.stlibon the Autonomy Edge public catalogue. - Installing a Library: pull a published library into another project from the catalogue.
- Library Manager: how installed libraries are organised and enabled per project.
On This Page